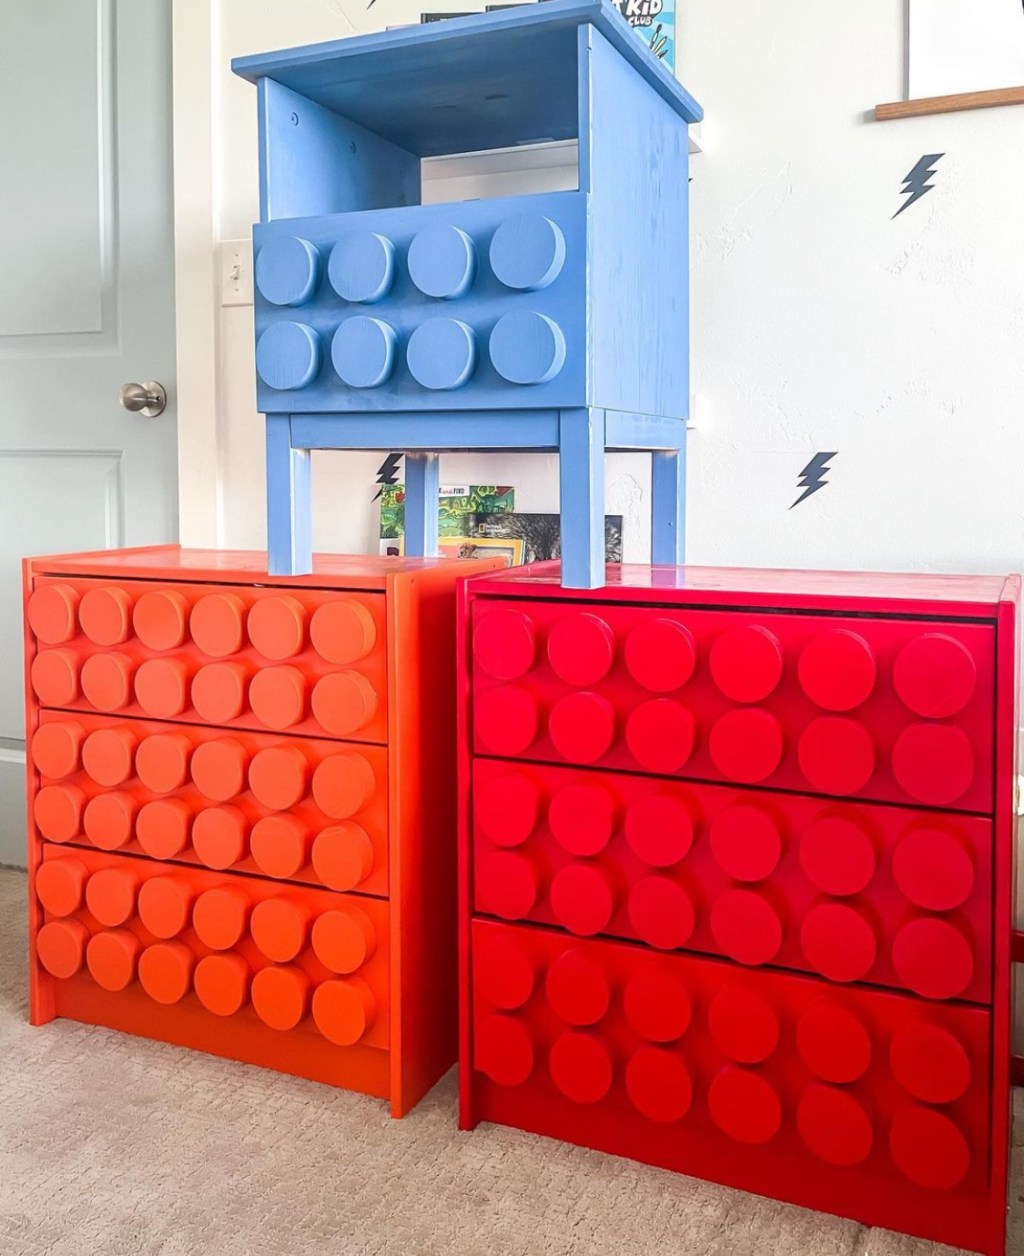
Are you ready to inject some playful charm into your home decor? Look no further than the world of LEGO, where creativity knows no bounds. In this blog post, we’ll explore how to transform a simple IKEA Rast dresser into a whimsical LEGO masterpiece using nothing but a few basic materials and a whole lot of imagination.
Materials You’ll Need:
- IKEA Rast dresser
- 3-inch dowel rods
- Wood glue
- Screws
- Screwdriver
- Sandpaper
- Red and orange spray paint
- Painter’s tape
- Clear coat spray (optional, for added durability)
Step 1: Prepare the IKEA Rast Dresser
Start by assembling the IKEA Rast dresser according to the manufacturer’s instructions. Once assembled, sand down the surfaces to ensure a smooth finish for painting later on.
Step 2: Install the LEGO Pegs
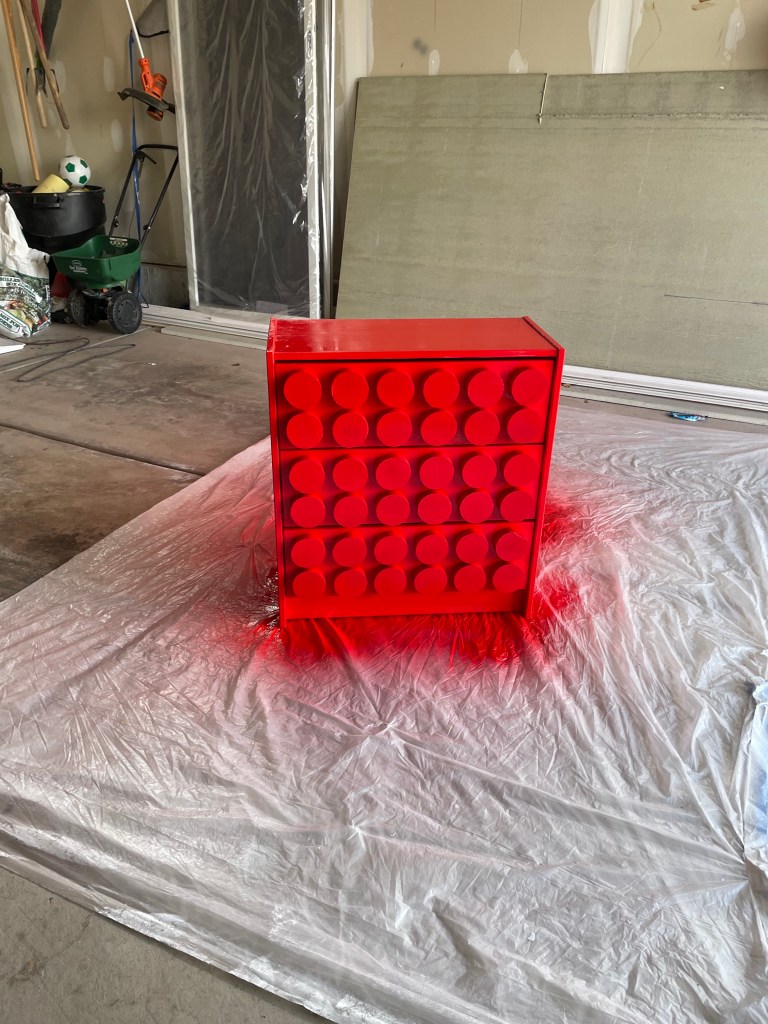
Measure and cut the 3-inch dowel rods into equal lengths, depending on how many LEGO pegs you want on each drawer front. We went for 12 on each drawer front with a 1.5 inch depth. These dowels will serve as the pegs for attaching LEGO bricks. Use wood glue to securely attach the dowel rods to the front of each drawer in a grid pattern.
Step 3: Attach LEGO Bricks (optional)
One option is to lay actual LEGO planks on top of the dresser. We decided against this since we wanted a flat surface. I could see the appeal to add more texture to the top of the dresser.
Step 4: Paint the Dresser
Now comes the fun part – adding a vibrant splash of color! Use painter’s tape to mask off any areas you want to keep paint-free, such as the edges of the drawers or the dresser frame. Then, apply several coats of red and orange spray paint to achieve a bold, eye-catching finish. We rarely use glossy paint, but in this case it is necessary to give the dresser a real LEGO look. Allow each coat to dry completely before applying the next to ensure a smooth and even color.
Step 5: Finishing Touches
Once the paint has dried completely, remove any painter’s tape and assess the dresser for any touch-ups needed. If desired, apply a clear coat spray to seal and protect the painted surface for years to come.
Step 6: Enjoy Your LEGO Masterpiece
Your LEGO dresser is now complete and ready to take center stage in any room of your home. Whether it’s in a child’s bedroom, a playroom, or even a quirky accent piece in your living space, this DIY project is sure to spark joy and conversation wherever it goes.
Conclusion
With just a few simple materials and a touch of creativity, you can transform an ordinary IKEA Rast dresser into a one-of-a-kind LEGO masterpiece that will delight both kids and adults alike. So gather your supplies, unleash your imagination, and let the building begin, literally!

Leave a comment