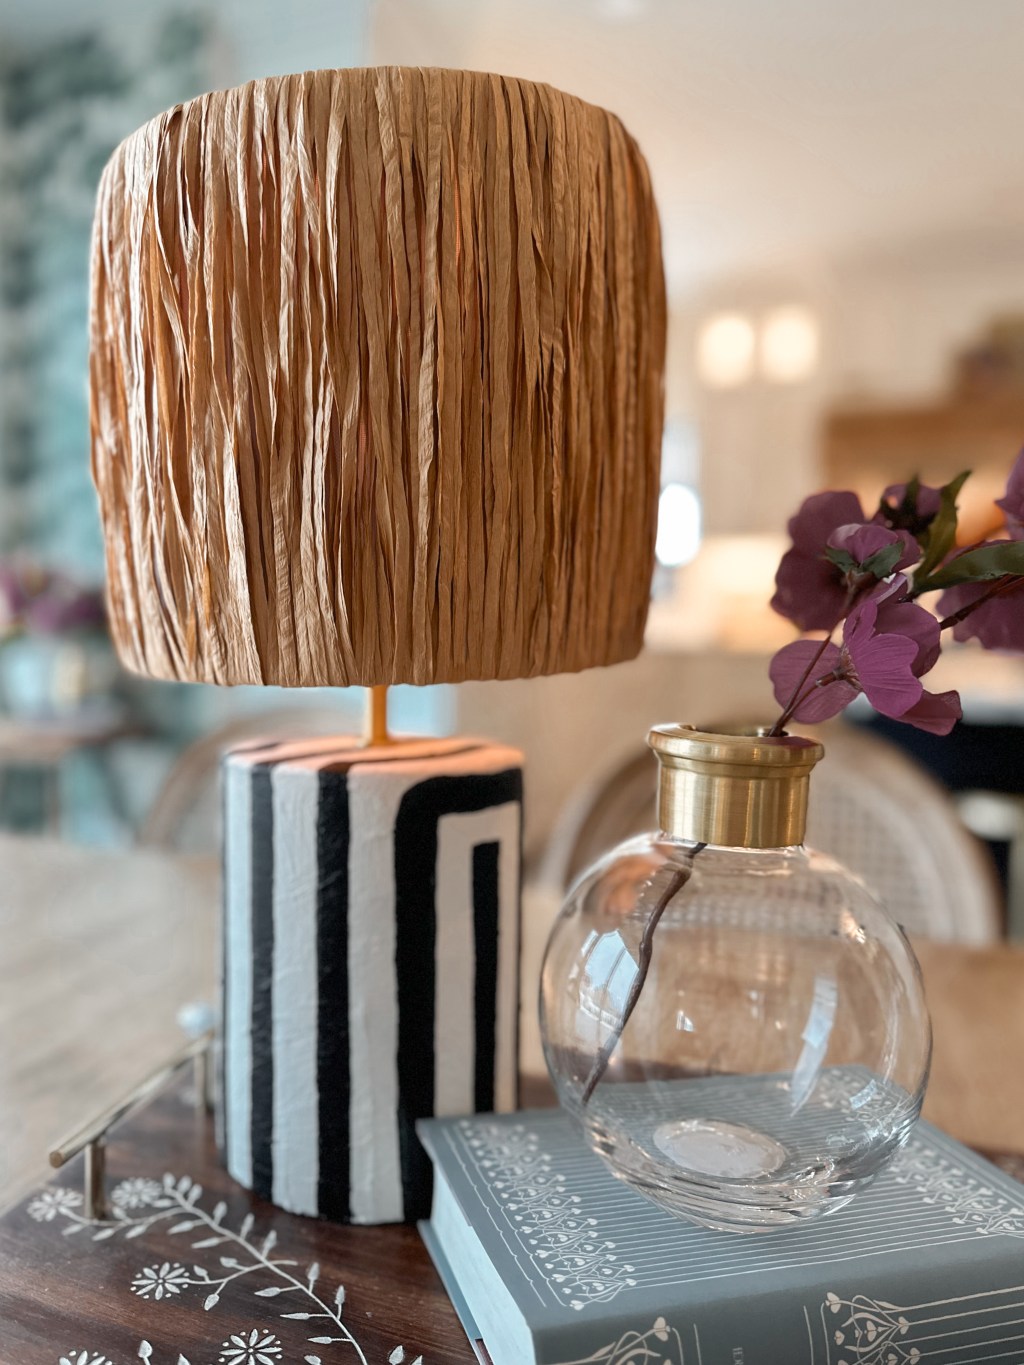
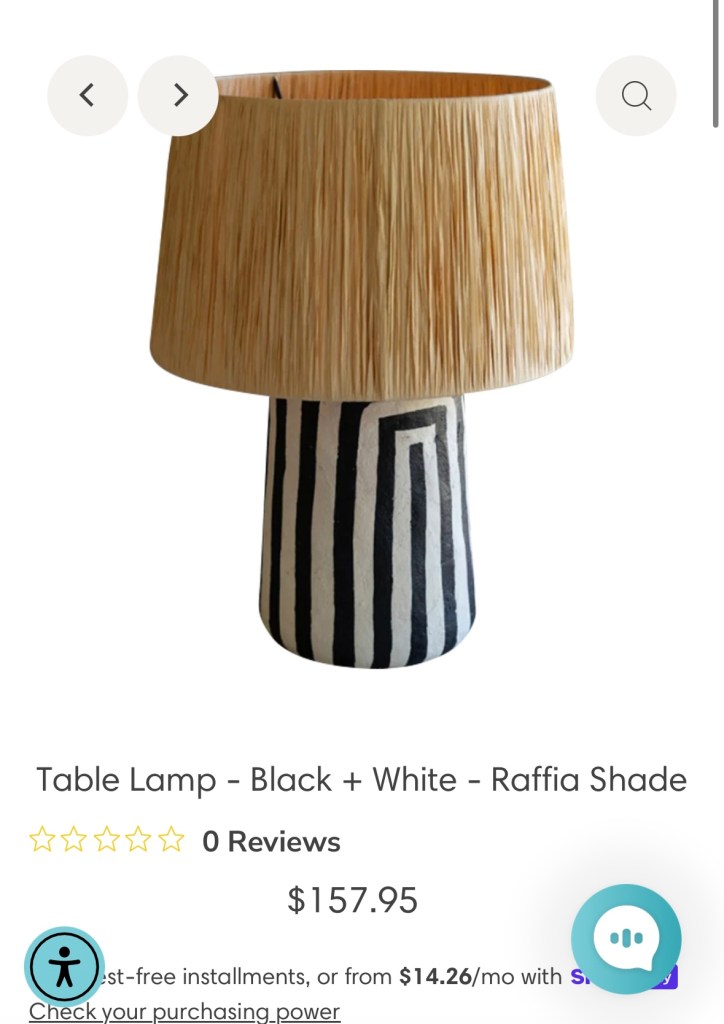
I was leisurely strolling through a local boutique when I stopped with a gasp. I had beheld love at first sight… *LAMP* love at first sight. I reached for the price tag but pretty much was slapped across the face when I saw the cost. For a split second I considered going for it but then a moment of reason crossed my mind and I said to myself, “I could totally make that!” And so I did…

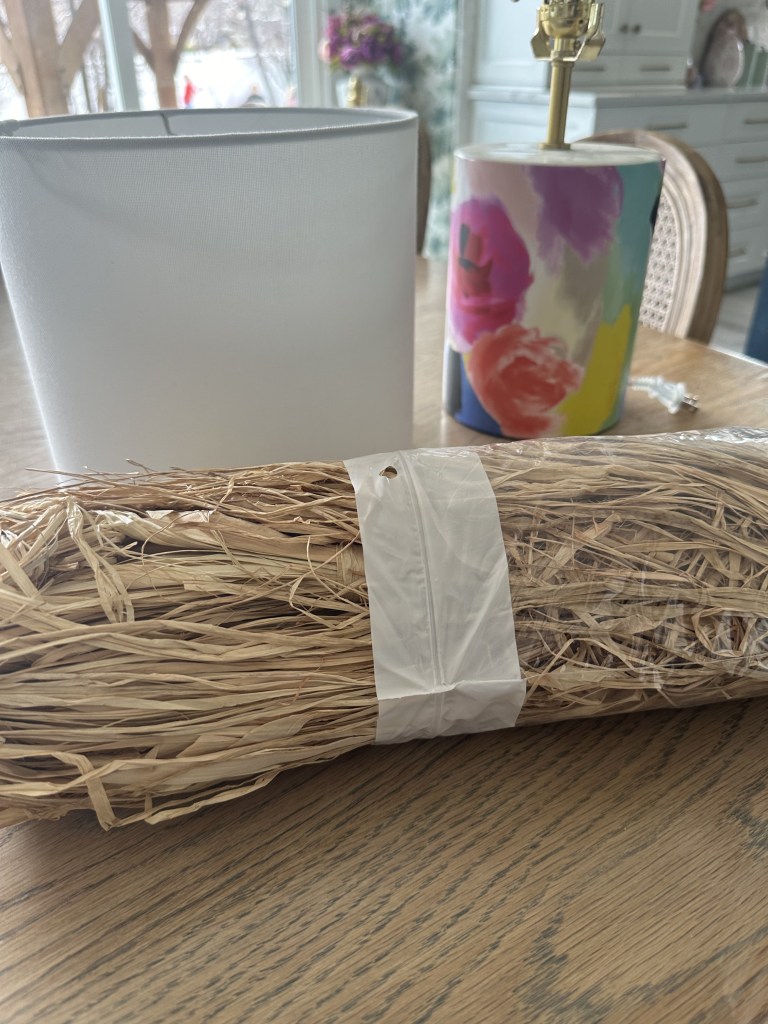
I foraged through our decoration graveyard in our garage and found an old lamp that was perfect for my idea. I found a lampshade (in that same pile of unused rubbish) that worked perfectly -and bonus, there was a cute little blue finial I decided to leave for a pop of color- then decided to break this project into two phases. Let’s begin, shall we?
PHASE 1: Painting the lamp base
- Clean the lamp base and prep for priming!
- Cover the lamp cord and lightbulb socket with painter’s tape (or anywhere else you might not want to get paint on the lamp).
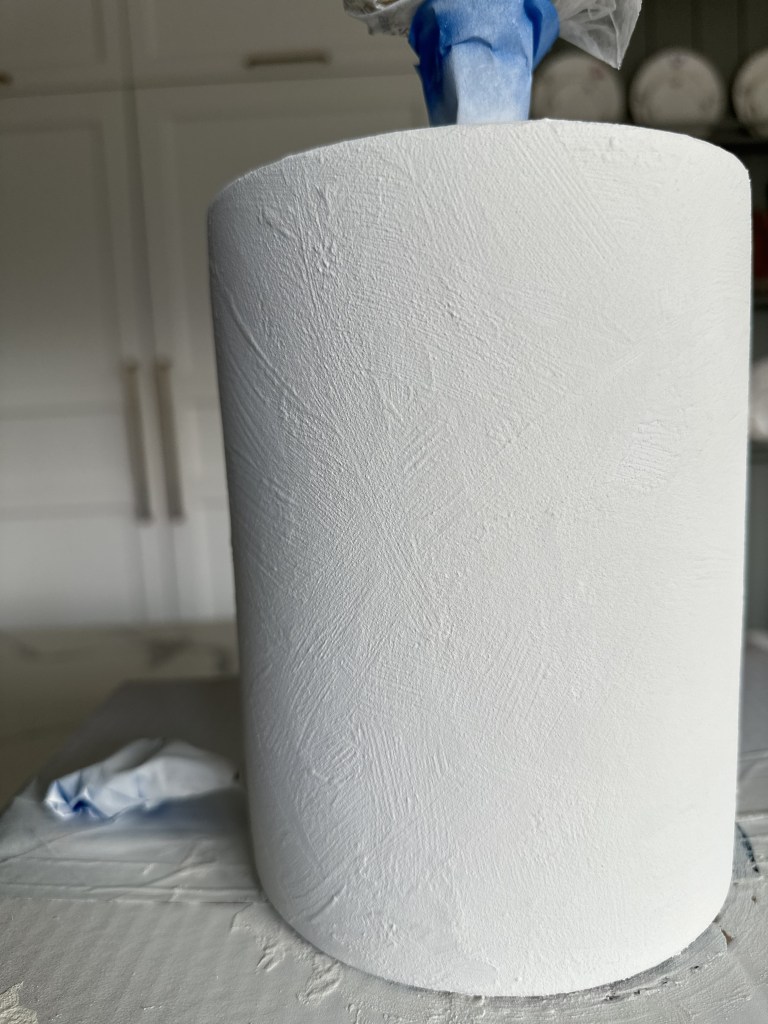
- Spray -or paint- on primer in thin layers. Allow to thoroughly dry between each layer (gotta avoid those nasty drips!). We used leftover spray primer from a project in our distant past.
- Now here is the fun part- mix baking soda with your desired paint. Again, we used some leftover paint from a past project. Add baking soda little by little until you have a thick consistency (think greek yogurt).
- Paint your mixture in all sorts of directions to create a concrete look as your base color! I did about three layers of this because I just wasn’t getting the texture I wanted but eventually we got there!
- Next, if you choose to paint a pattern, now is the time- once the base layer is dry, of course! I really wanted to mimic the lamp I saw in the boutique so I opted for those heavy contrasting black/white lines.
- **optional** To make my lines really clean on the lamp (since I’m not awesome at controlling a paintbrush to achieve that look) I busted out my trusty acrylic paint pens and made the lines on the lamp base nice and crisp. Also, keep in mind these lines aren’t perfect! The lamp in the store totally had a “freehand” look to the pattern so I didn’t measure or pre-plan anything (and thus we find the major difference between Spencer and me).
There you have it! Your lamp base is done! Do you love it? Let me be honest with you- this “phase 1” took me TWO tries. That’s right. Two. Remember the part where I said I didn’t measure out a dang thing? Well, That took its toll and after round one, I was left with some tilting/leaning lines. I just wasn’t happy with it and I didn’t want to hate the lamp every time I looked at it so I quickly went back to step #5 and painted on my leftover mixture over the leaning pattern. *Phew*. Second try was MUCH more successful! I just used the edge of a paper to help me eyeball straight vertical lines. Now back to the point… Go ahead and grab your lampshade and enjoy your beautifully up-cycled lamp -OR- move on to Phase 2 of this project for your raffia lampshade.

PHASE 2: Adding some fun to an old lampshade
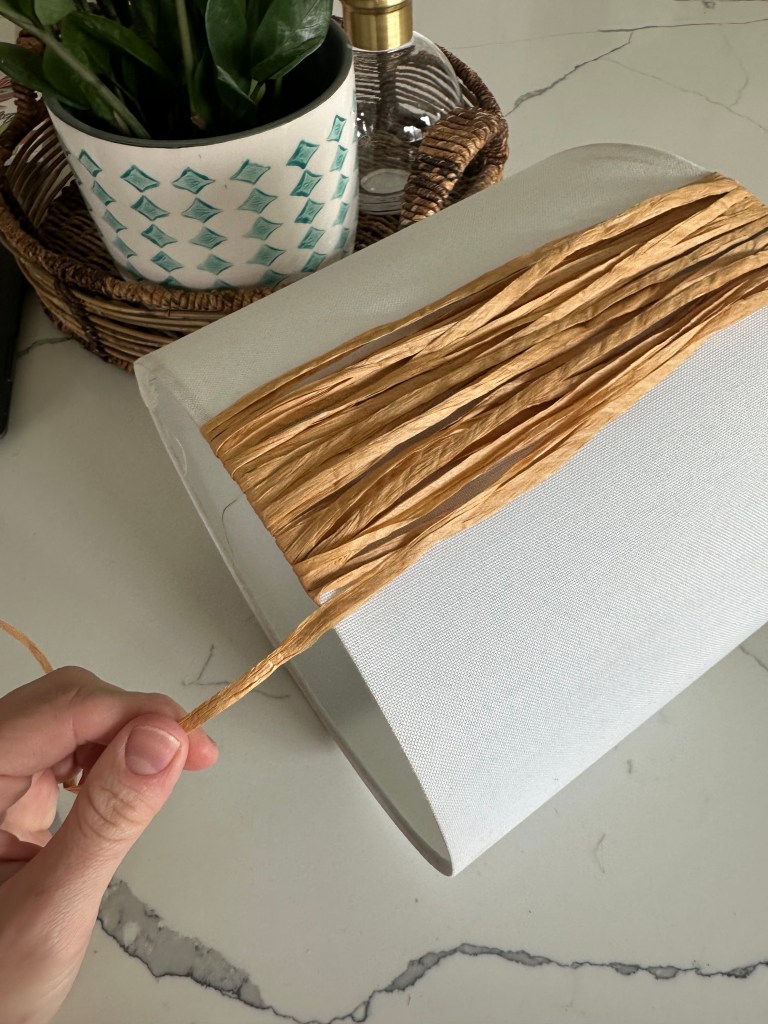
This lampshade was close to the death of me! Close- but not quite. Im totally obsessed with it and love how it turned out but there was some grief getting there. I searched my local craft stores (Michael’s and Hobby Lobby) for some raffia but neither had the kind that came in a spool. I thought I’d be okay to get the stuff in the bag and just tie it on in little knots. BIG MISTAKE! Don’t do this! Let me repeat: Do not do this! I thought it would be a good idea and that I could just scoot the knots into the center of the lampshade where they wouldn’t be seen but it was SO time consuming, messy and not as easy to move the knots as I thought it would be. I was 97% finished with covering the lampshade with that bagged raffia when I decided I hated it and needed to get the raffia on a spool so I could avoid those pesky bushy knots. If you want to avoid the heartache I experienced with this raffia lampshade on round one, read on…
- Get a SPOOL of raffia. This is the one I got (and love).
- Tie a really tight and tiny know to one of the exposed parts of the lampshade frame.
- The rest is really easy- All you’re going to do is wind the raffia around and around and around the entire lampshade! The spool I bought came with 218 yards and I used every last inch of it! I mean, over two football fields on a lampshade…whaaaat?
- Tie off the end of the raffia string to the frame line. I would say tie it off where you began but I had a bit leftover and wanted to REALLY cover the shade well so I started going around the lampshade again, thus tying it off on a different frame (see pics/video below)

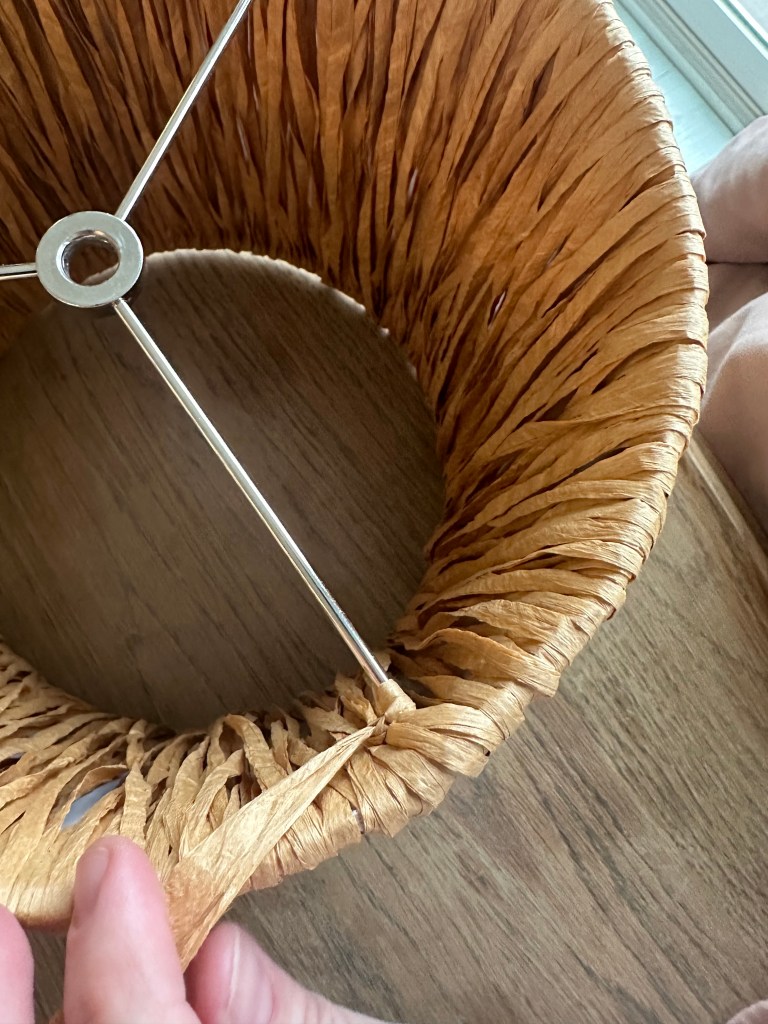
That’s it! Zero adhesives or special equipment required for this lampshade makeover. Do you love it? I know I do! Want to see more? Go follow us on Instagram @homewithq and check out our Facebook page Home With Q. Thanks for reading along!

Leave a comment