
When it comes to pantry design, adding character and a touch of personality can transform the scariest part of the home into a space that truly reflects your style. One fantastic way to achieve this is by incorporating unique elements like a scalloped wood backsplash paired with a classic butcher block countertop. In this blog post, we’ll explore the charm and versatility of these two design elements and how they can come together to create an inviting and not-so-scary pantry space.
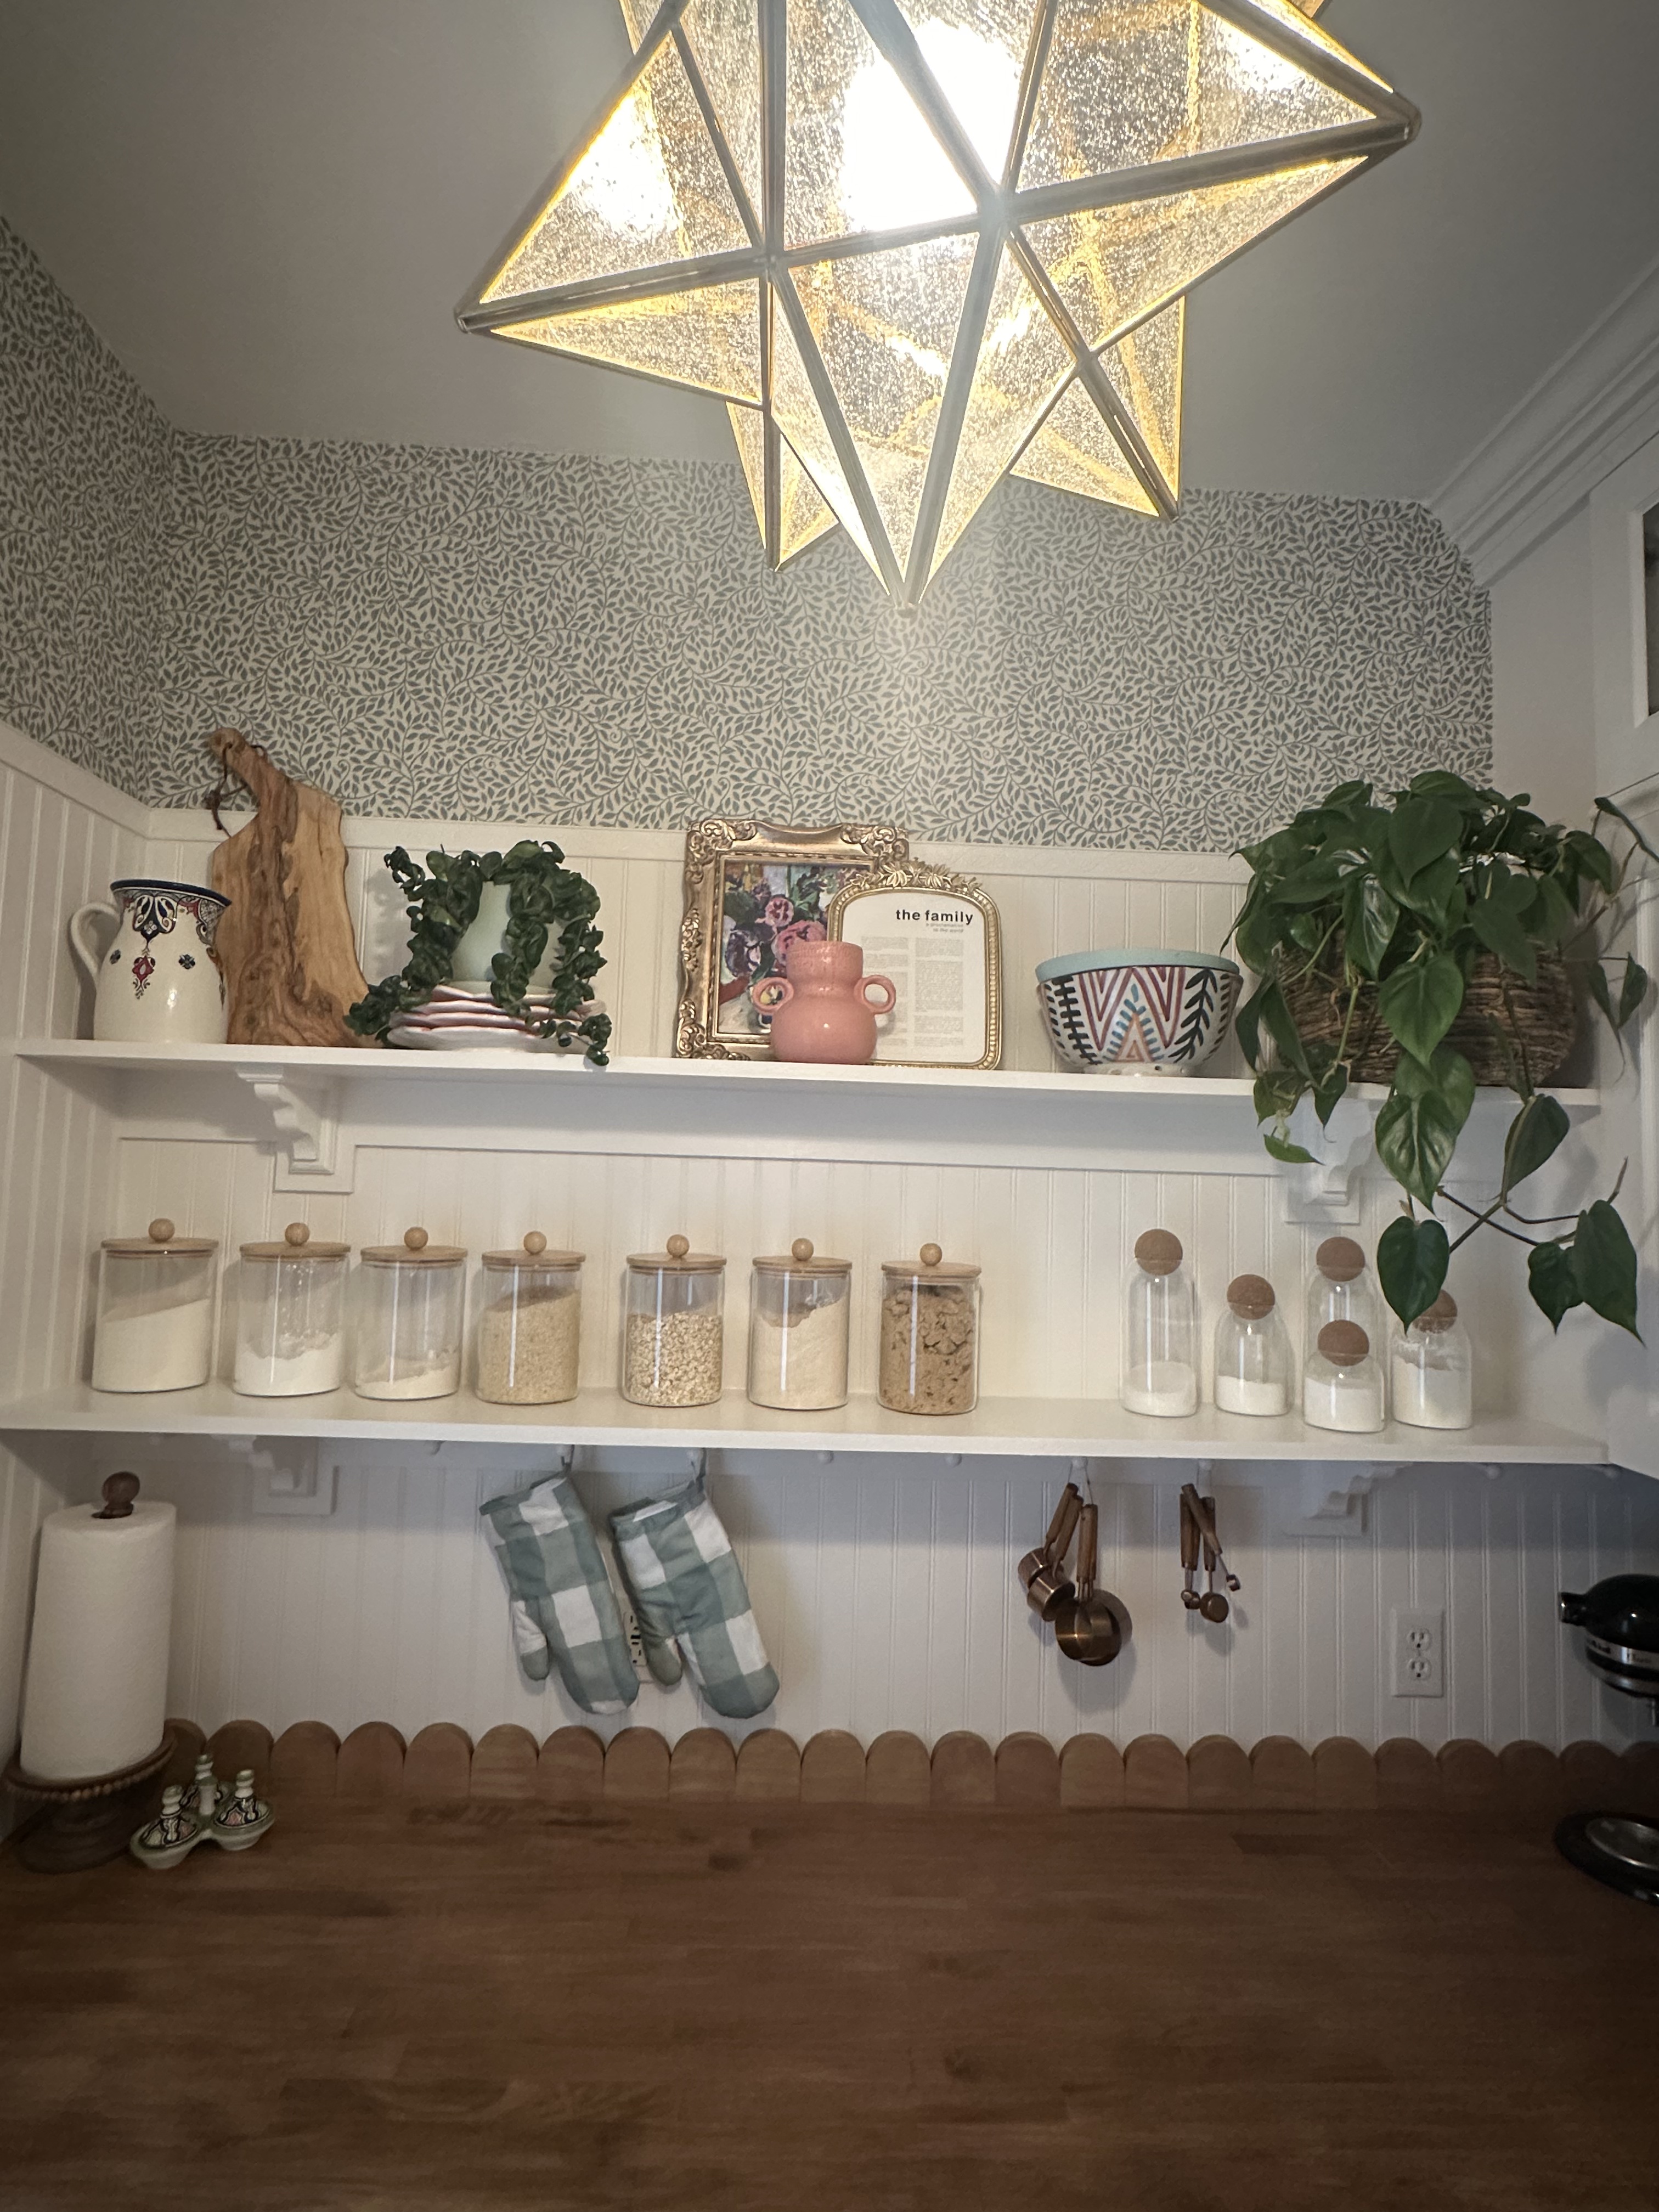
From all the feedback received from this pantry makeover, the top two “must-haves” were appliance outlets and permanent space for those appliances to live. Thus, this pantry makeover can be categorized as a butler’s pantry
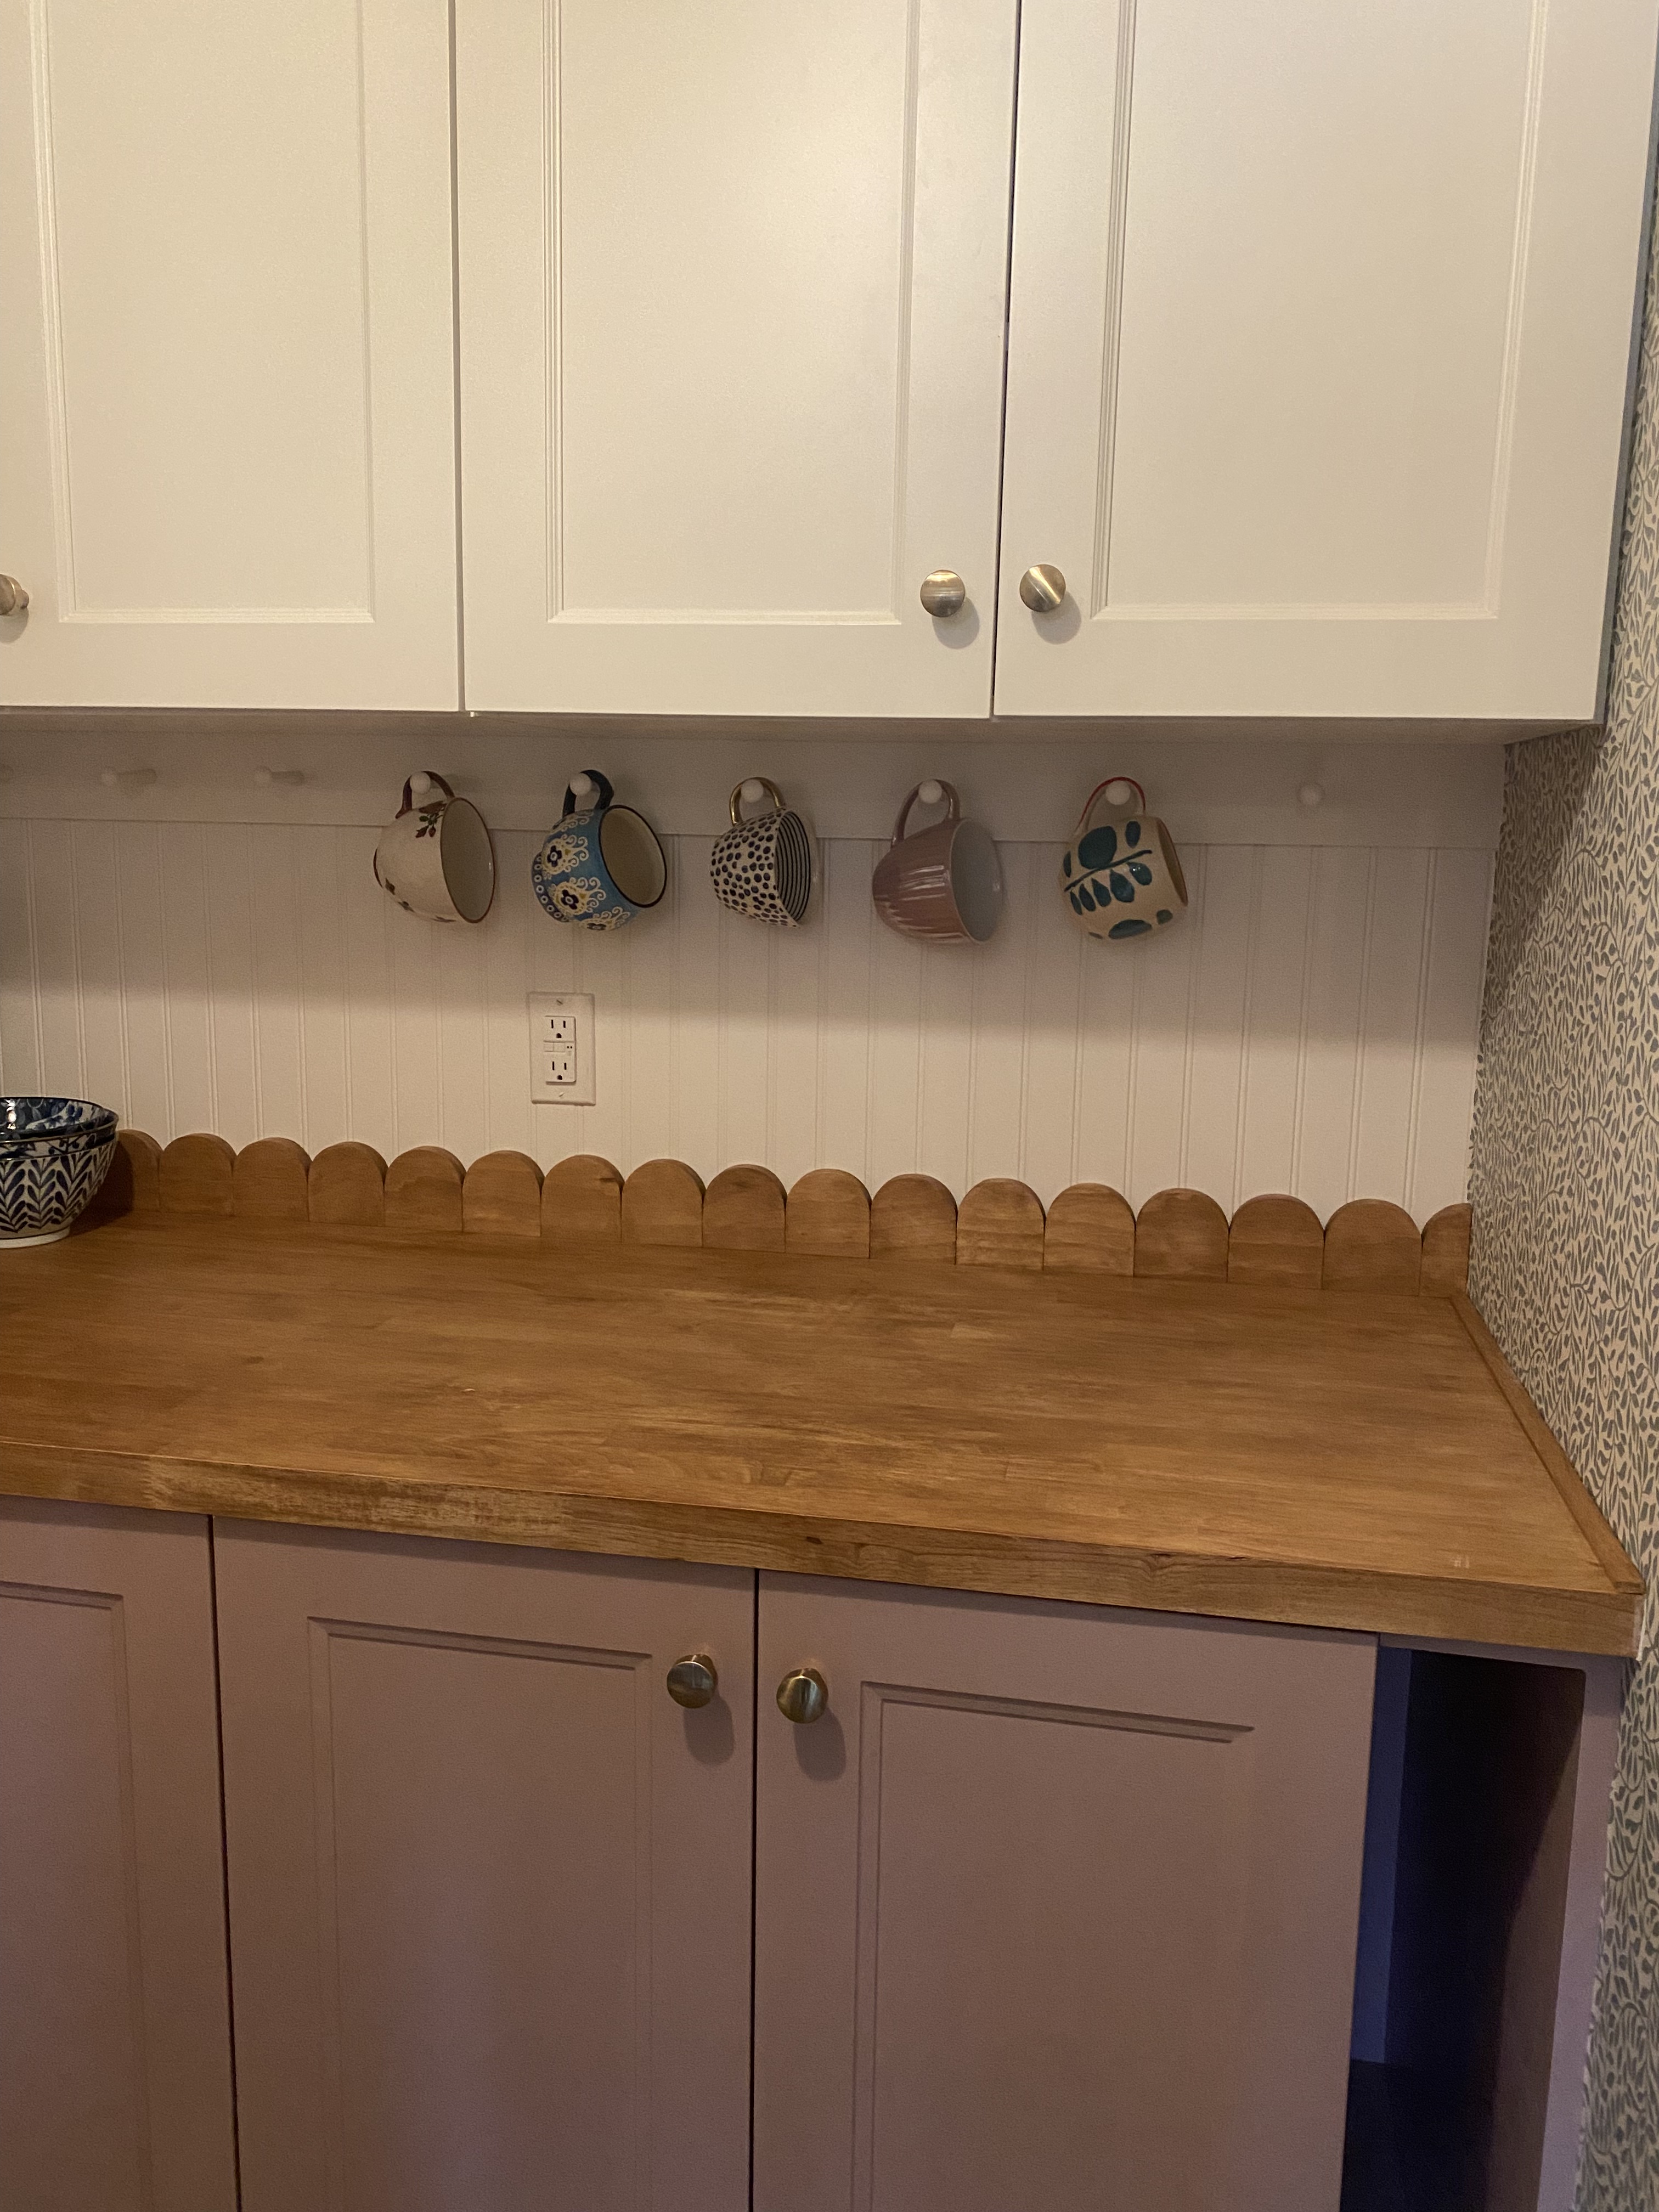
The Timeless Appeal of Butcher Block Countertops: Butcher block countertops have been a staple in kitchens for decades, known for their durability, warmth, and natural beauty. They provide a cottage and inviting feel, making them an excellent and less-expensive choice for both traditional and modern butler panty designs. With proper care, butcher block countertops can age gracefully, developing a rich patina (similar to copper pots) that adds character over time.
Choosing the Right Wood for Your Butcher Block: The first step in adding character to your butler’s pantry is selecting the right wood for your butcher block countertop. Common choices include maple, oak, cherry, hevea, veneer, and walnut, each with its unique grain pattern and color. Since the base cabinets were purchased from IKEA, the veneer butcher appeared to be a good option, however, upon further research we found a solid hevea butcher block from Lowes that happened to be on sale! Easy choice.
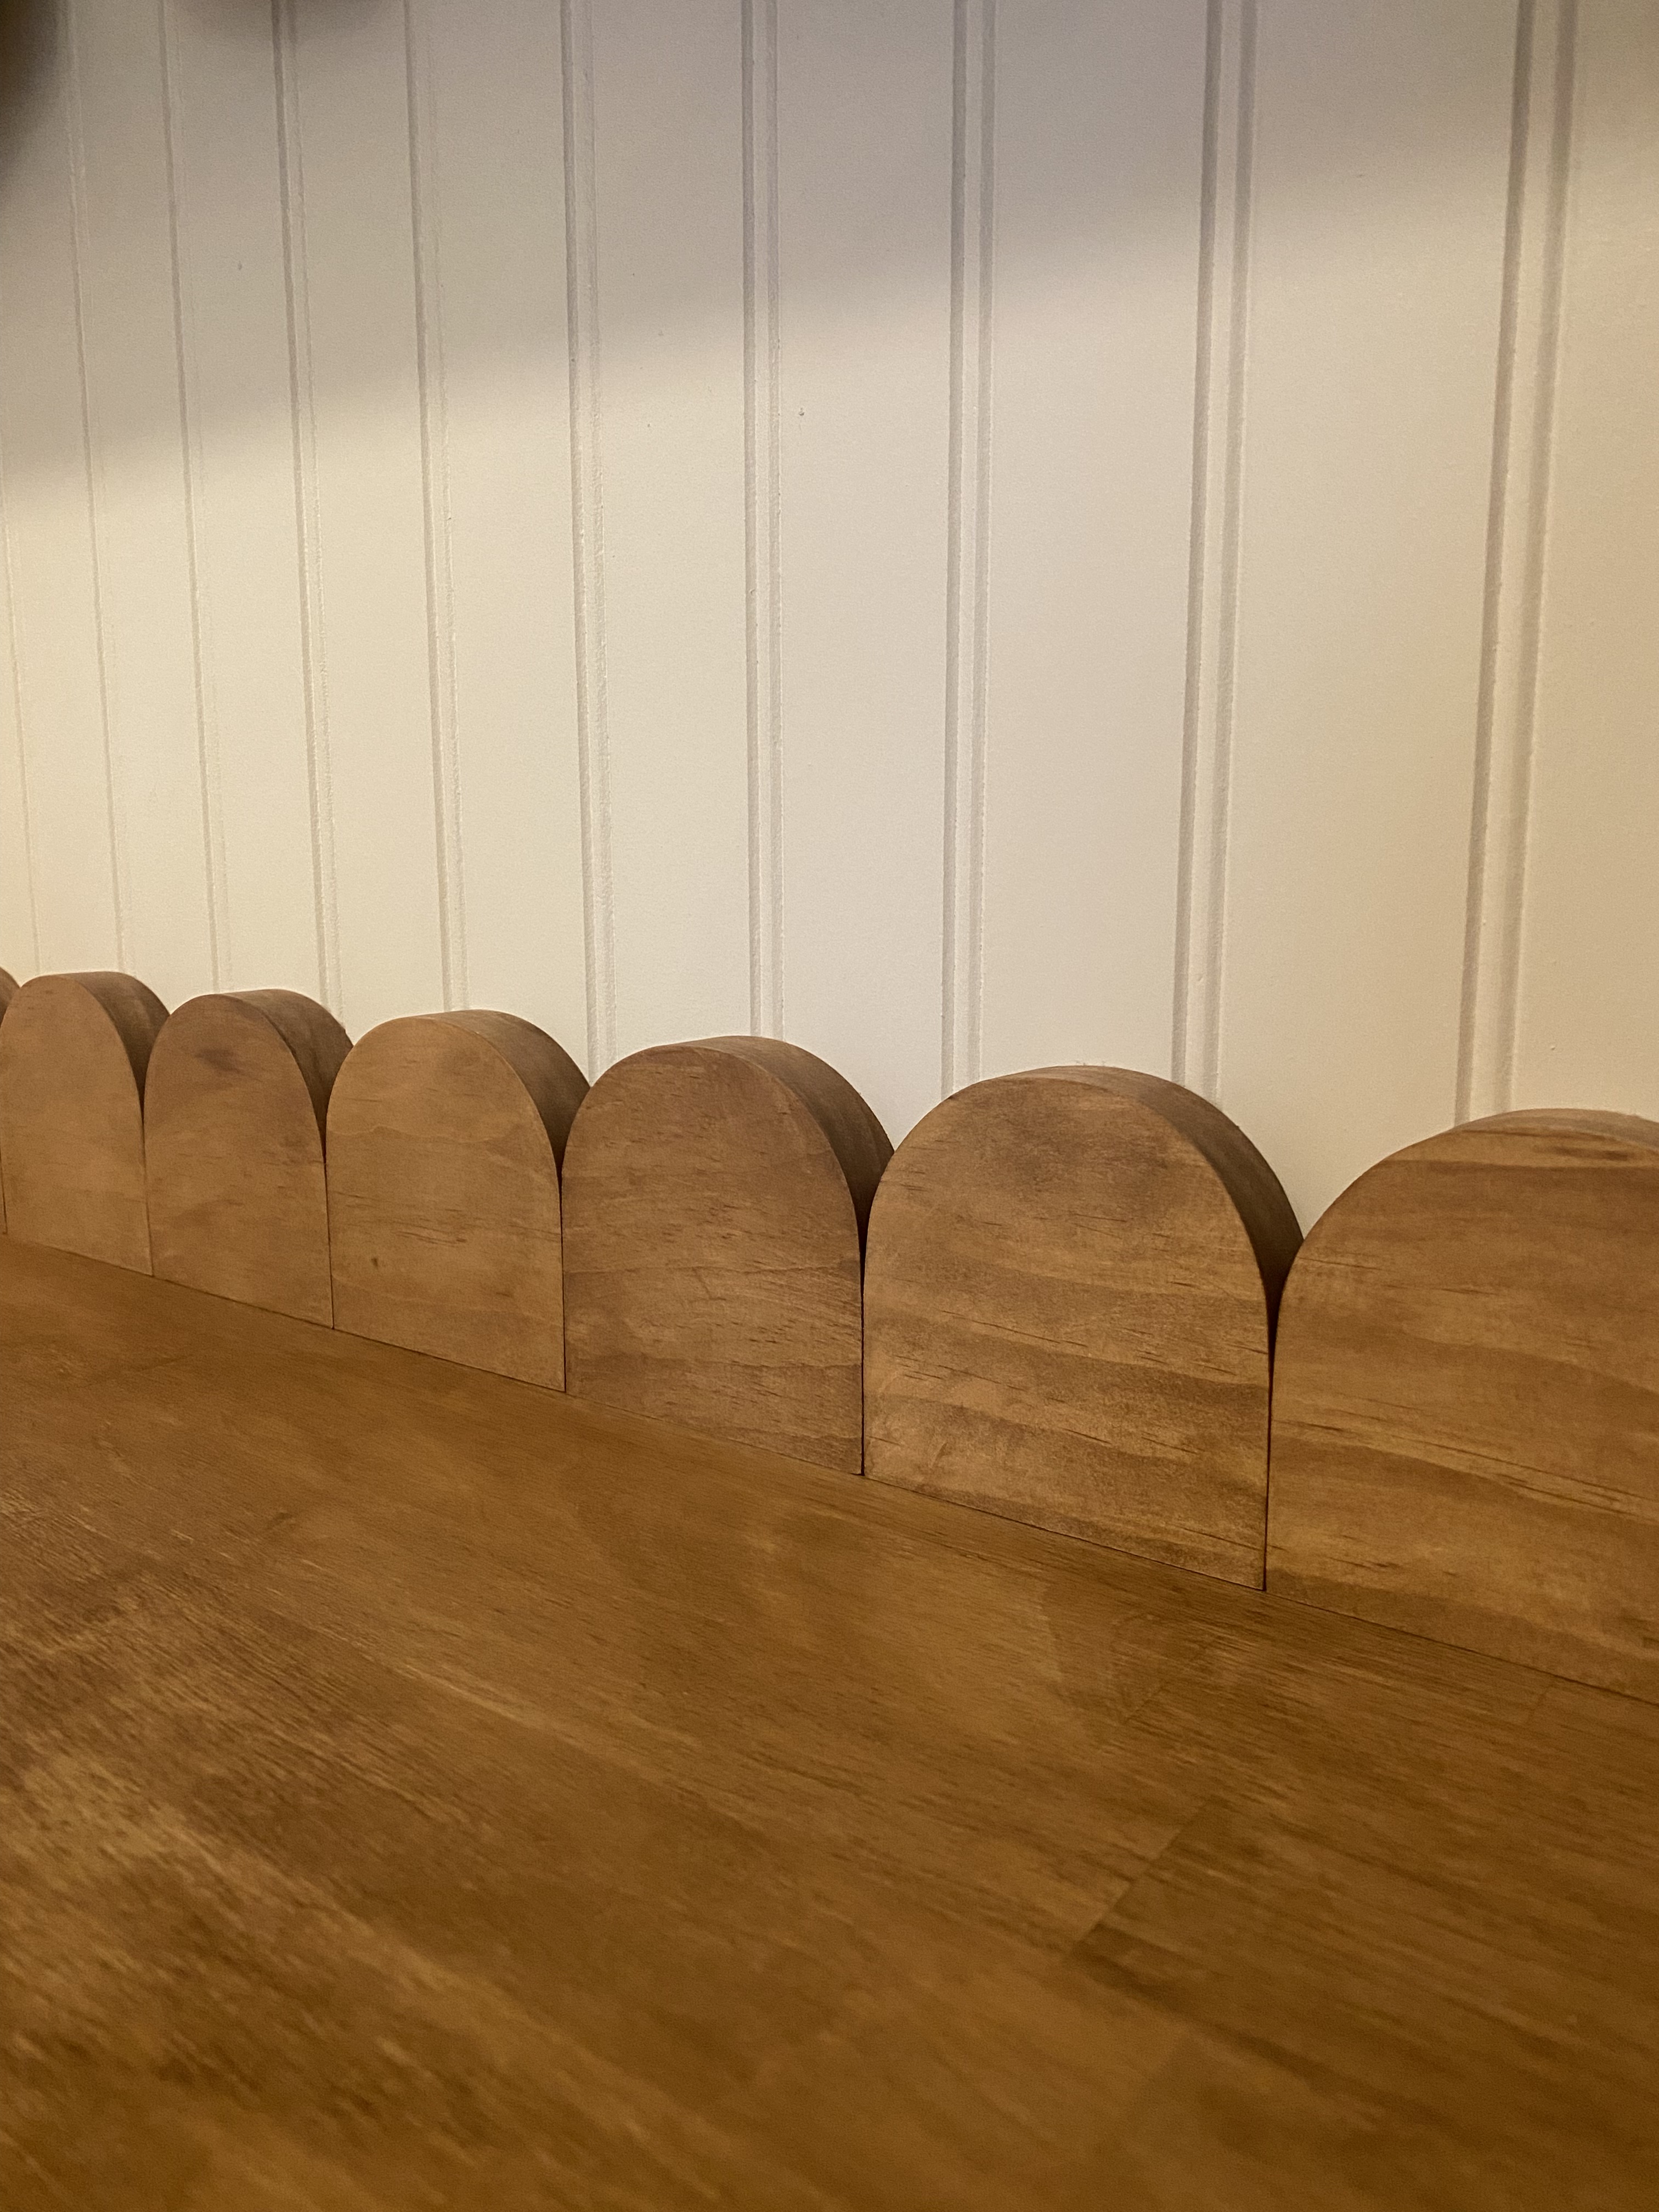
Crafting a Scalloped Wood Backsplash: Now, let’s turn our attention to the scalloped wood backsplash. This design choice adds a touch of whimsy and elegance to the new pantry. Scalloped edges create a soft and visually interesting pattern, breaking away from the straight lines commonly found in kitchen design. You can create a DIY scalloped wood backsplash by cutting individual pieces of wood into curved shapes and arranging them in a repeating pattern.
Making the Cuts: Using a CNC machine would make this job easier, but spending $2,000 seemed to be out of the question. Choose a hard wood such as oak, maple or premium pine to prevent warping. Create a template for all the scallops. Depending on size of your scallops, find a round household item like a cup or bowl which suites your desired sizing. The first cut will be the template later used with a flush trim router bit. A scroll saw can be used to cut the perfect “arch” for the template scallop. Take your time when cutting the template and sand the rough edges for imperfections.
Use small hand clamps to bind the template to the wood block. If you have never used a router before, make a few practice cuts with scrap would. Pro tip: cut with the grain of the wood to avoid chipping. Use safety glasses and gloves.
Sanding, pre-stain, wood stain and polyurethane: We have a great tutorial for wood staining on this post.
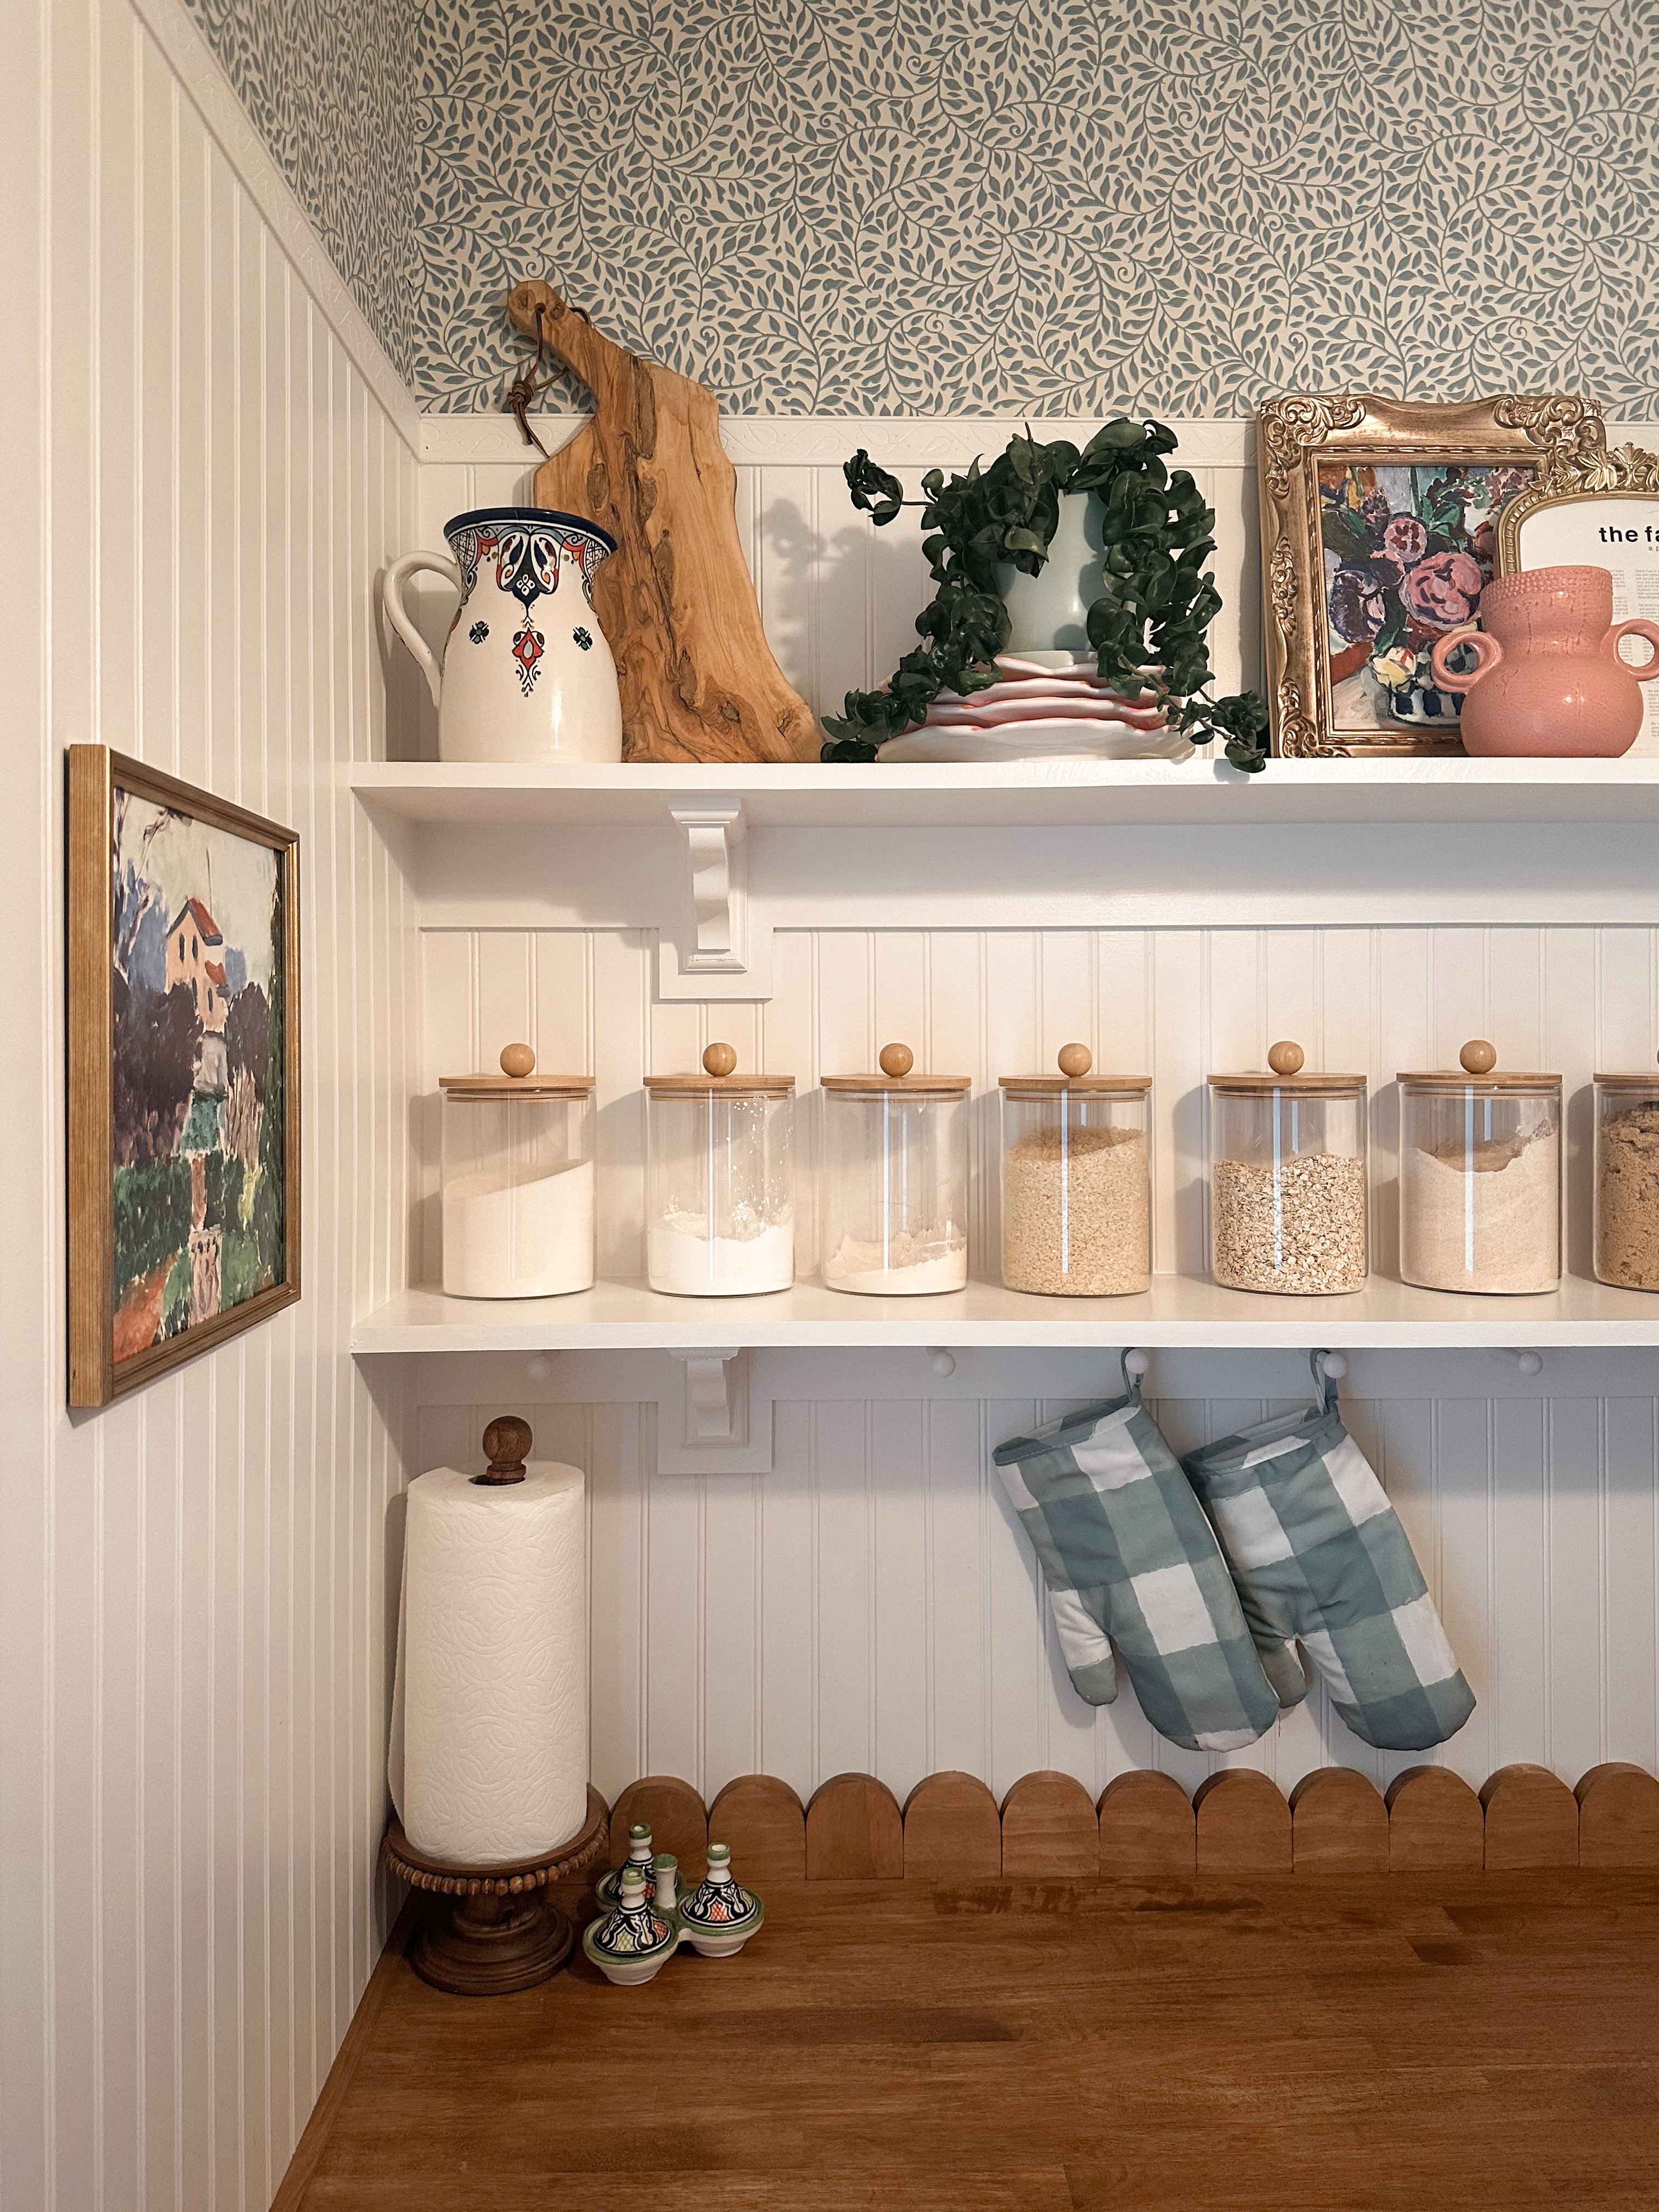
Personalizing Your Space: The beauty of incorporating a scalloped wood backsplash and butcher block countertop lies in the opportunity to personalize your pantry. Consider adding open shelving with decorative items, hanging utensils or your favorite wall hangings to further enhance the charm of your culinary space. Your butler pantry will become a nice extension of the kitchen.
By combining the timeless appeal of butcher block countertops with the unique and charming design of a scalloped wood backsplash, you can transform your kitchen into a space that reflects your personality and style. The warmth of wood, the elegance of scalloped edges, and the practicality of butcher block create a harmonious blend that adds character to your culinary haven. Embrace the beauty of natural materials and craftsmanship, and enjoy a butler pantry that is as inviting as it is functional.


Leave a comment