Let’s get those links out of the way, shall we?
ceiling light / Ivar cabinets / countertop material / recessed vent box / watercolor storybook maps / laundry hamper / rug / green paint *SW classifies this as a blue but it totally looks more like a deep jungle green! / white paint / wall clock
Greetings again, dear friends! I wanted to share our laundry room redo for the sole purpose of sharing some ideas for semi-simple updates to help a room feel fresh. For major remodels, usually you see new flooring, something cool and new with the window(s) (adding windows, larger windows, multi-paned, whatever….), maybe additional plumbing for a sink… the list could go on and on, right? That’s not always realistic for those of us who just need a little pick-me-up when it comes to a space in the house itching for attention.
I will confess and own up to this time and time again- I absolutely hate laundry. Sure, clean clothes are nice and I’m truly a rockstar at starting laundry…but the switching, folding, and putting away the laundry is a major “thumbs down” for me! Let’s take a quick peek at the laundry room in its’ original state.
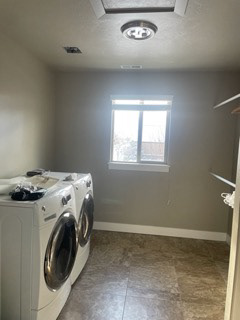
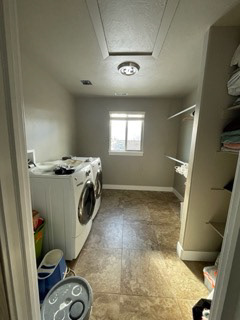

Not horrible…but kind of. Let’s dissect it a little. First and foremost, the beige paint on the walls and ceiling had to go. Easy fix! Second, the appliances were awkwardly positioned in the room. Zoom in on that second picture. See where the hookups are? ABOVE the machines? What the crap? Why?! talk about an eyesore! Third, zero cabinet place! Can you believe these are pictures of it “cleaned out”? Since there was no cabinet or counter space, stuff just ended spewing all over the floor. “Go run this rag to the laundry room.” Floor. “Can you put your dirty clothes in the laundry room?” Floor. “Hey this cleaner needs to go back to the laundry room.” Floor. Plenty of floor space to go around but that makes zero sense and is zero functional for a laundry room. I mean, I already hate the chore but having a den of chaos as the setting for the loathsome work just made me procrastinate it to the last possible minute. I decided out of nowhere to just handle it. Here was my plan: 1. Buy the Ivar IKEA cabinets since I’ve seen a million and a half hacks that are pretty dang awesome. Surely I could just put those on the wall and be done with it right? 2. Paint- something funky to bring the space to life and make it a little more interesting. I am drawn to bold color like a moth to a flame! 3. New light fixture. obvs. Such an easy way to make a room more vivacious! I moved ahead with my project with those three things in mind. But then it spiraled… I got Mr. Q’s handyman brain on board and we realized we had one major thing that needed to be fixed: the hookups. We both agreed that although this wasn’t a major remodel, what little we were doing needed to be done right. We would 100% regret not adjusting the ugly hookups so we forged ahead and added that undertaking to the list!
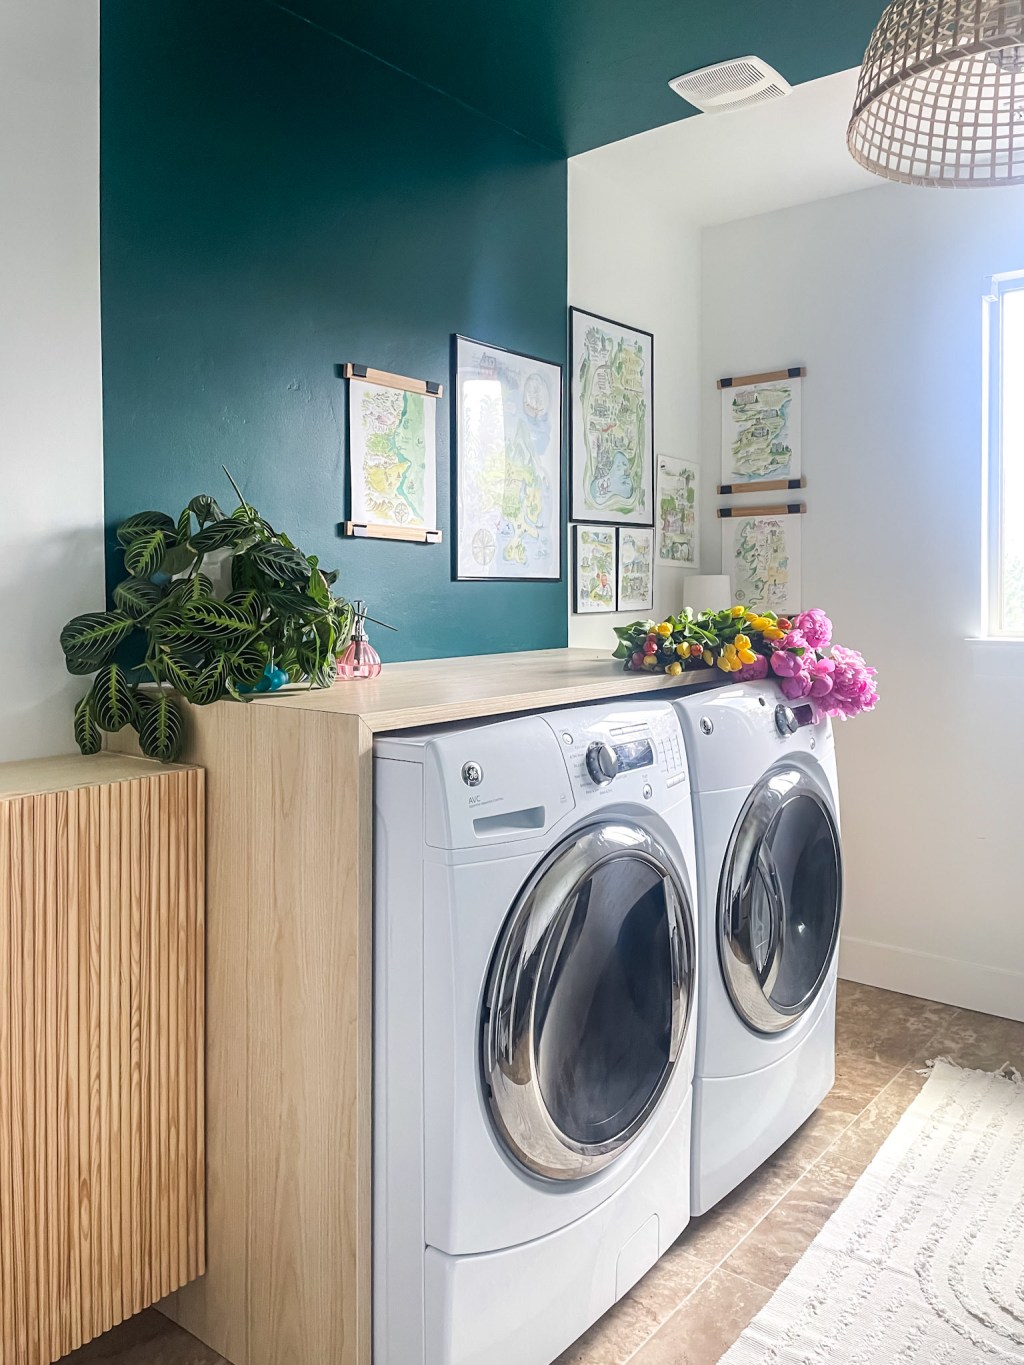
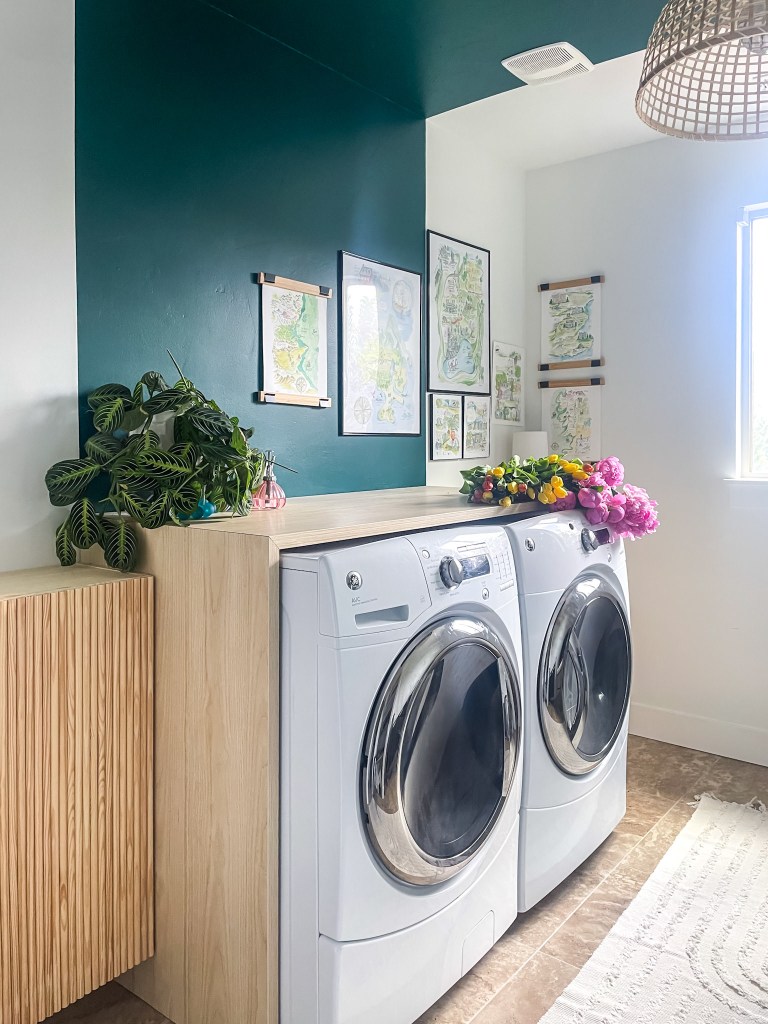
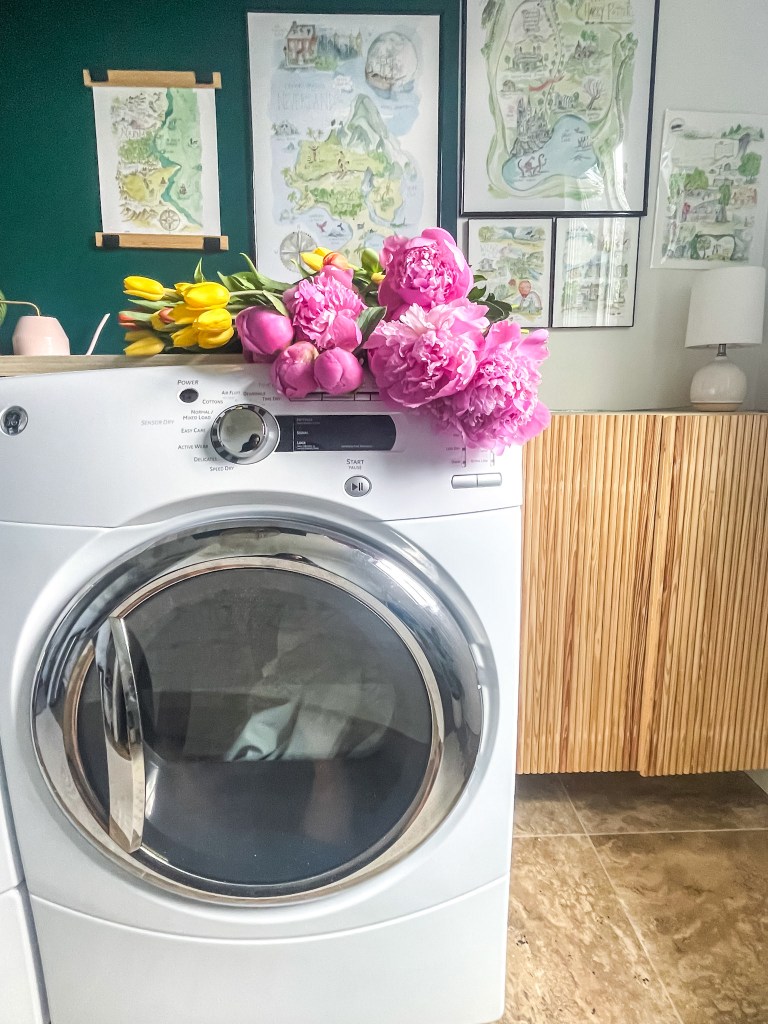
Spencer toiled over the measurements and supplies he would need to properly and safely move the hookups lower on the wall. He also added a recessed dryer vent box so the machines could sit up against the wall. HIGHLY recommend! Our previous dryer vent hose seriously flowed out and around the appliances and just hung there….like, five feet of just hanging there. So annoying! The recessed vent box helped contain and hide the hose which did wonders for the room!

Now that all the nitty gritty goods of the appliances were better concealed, Spencer set to work building the waterfall countertop for the washer and dryer and I started on those glorious Ivars! Spence used the countertop material linked at the beginning of this post to make that sturdy, lovely, and oh-so-functional counter!! I love how it contains and defines the space of the appliances!
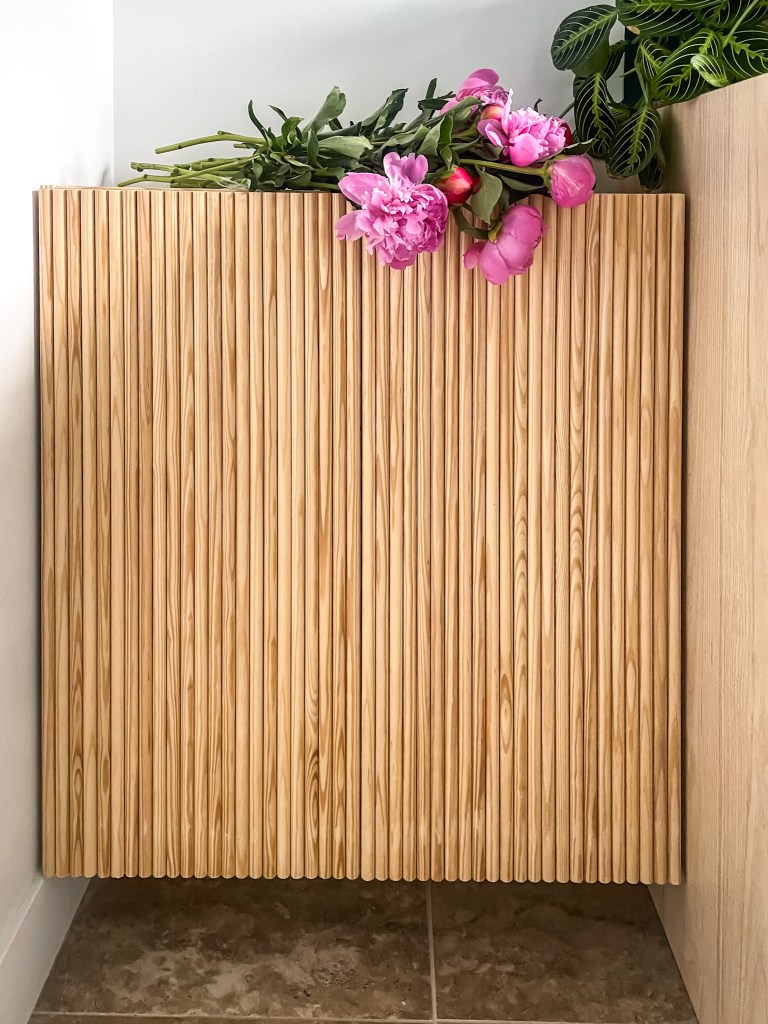
Let’s talk about those Ivar cabinets! We will be posting the DIY for these babies soon but in the meantime, here’s our main advice: USE WOOD GLUE! Use a nail gun only if extremely necessary! If you look closely, you can see the line of wood filler that wasn’t entirely disguised after sanding. We used this same texture technique on another piece of furniture and tried using wood glue instead and it yielded a much better result! Let’s be honest here, as I walk in and out of that room, busy with full arms of laundry and children, the last thing I’m noticing is the nail hole catastrophe. The first thing I notice is what a lovely texture it adds to the room! I sometimes strum my fingers along the half rounded dowels just because it looks so pretty!

Painting the walls and ceiling white was such a breath of fresh air! It immediately changed the mood of the room! Now is the point of this story where I need to sing Mr. Q’s praises. I tried to explain and draw out my crazy color block idea and I’m sure he had so many questions and red flags wave in his brain…I mean, who paints a block of heavy green paint on a freshly painted white ceiling? Apparently I do! He totally went along with it and just let me go about my crazy business. Here’s the thing: it’s easy, “safe”, and “predictable” to stay traditional and maybe even conservative with paint and just home design in general…but I never want to leave a project with a “what if” in mind. What’s worse would be, “I should have tried (XYZ)…” I want to make our home our own little heaven! I want it to be a happy place filled with things that bring our family happiness, and for me, color brings happiness! I went for the color block stripe and still love it to this day! I feel like I’m standing under a jungle canopy or something else exotic even thought I’m just in a plain ole’ laundry room! Moving on from the paint for two seconds: the icing on this cake would be the ceiling light! I truly feel like a room isn’t fully complete without a fun and interesting ceiling light! It takes a room from that “builder grade” feel to “custom”.
Let me now divert your attention away from the dryer and toward the darling watercolor storybook maps on the wall! Nothing symmetrical about the way I chose to hang these pics- in fact, you can see how they wrap around to the other wall (which is so dang fun to me), but the one thing they have in common to really bring it all together is the whimsical watercolor…oh, and the nostalgia they bring to everyone who stops to look at them for a half second between comings and goings. I can’t tell you how many times my kids have stopped to look and say things like, “Mom! We read that one together last year,” or, “I remember [such and such] place in Narnia!” Here’s something you should know about our family. We LOVE reading! This past year we have been able to watch the bug for reading take off in our kids and I couldn’t be more thrilled about it! Adding this wall art personalized the space and helps take my mind to my favorite stories while I mindlessly sort, switch, or fold the laundry.
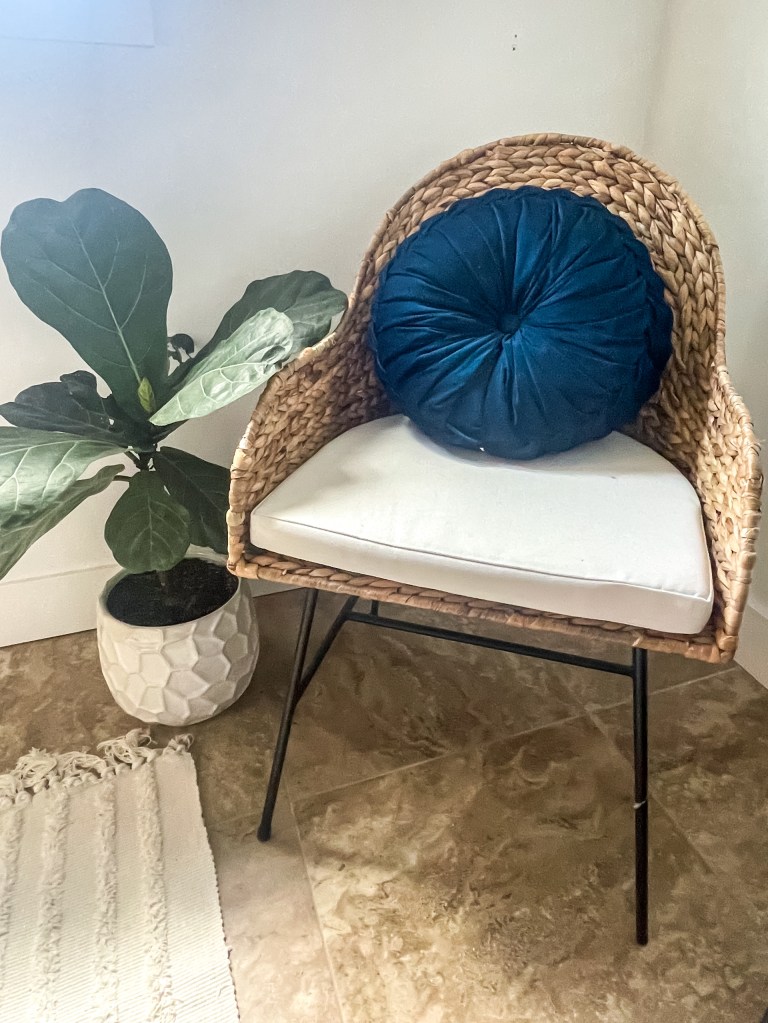
I added a little chair next to my fiddle-leaf fig that has been in rehab for a little while (check out the new leaf budding! YAY!) to make the space a little more inviting. We took out the lower hanging rod and added the laundry hamper along with the chair on the opposite wall of the appliances. Since changing the flooring was not an option for this project, I opted for a rug-fully thinking it would be a horrible idea two or three months down the road but I had to give it a try. Turns out I love it! Brings warmth to the room and is so easily cleaned. The ivory color has not been a problem at all….and that’s saying a lot since there are nine humans and a dog in this household!
Let’s have a little recap and moral-of-the-story moment: Not all home improvements need to be massive undertakings! A little goes a long way! Yes, the work with the hookups was pretty involved but the rest of it was fairly basic(ish) stuff! Gather your ideas, form a plan, and go for it!!

Leave a comment