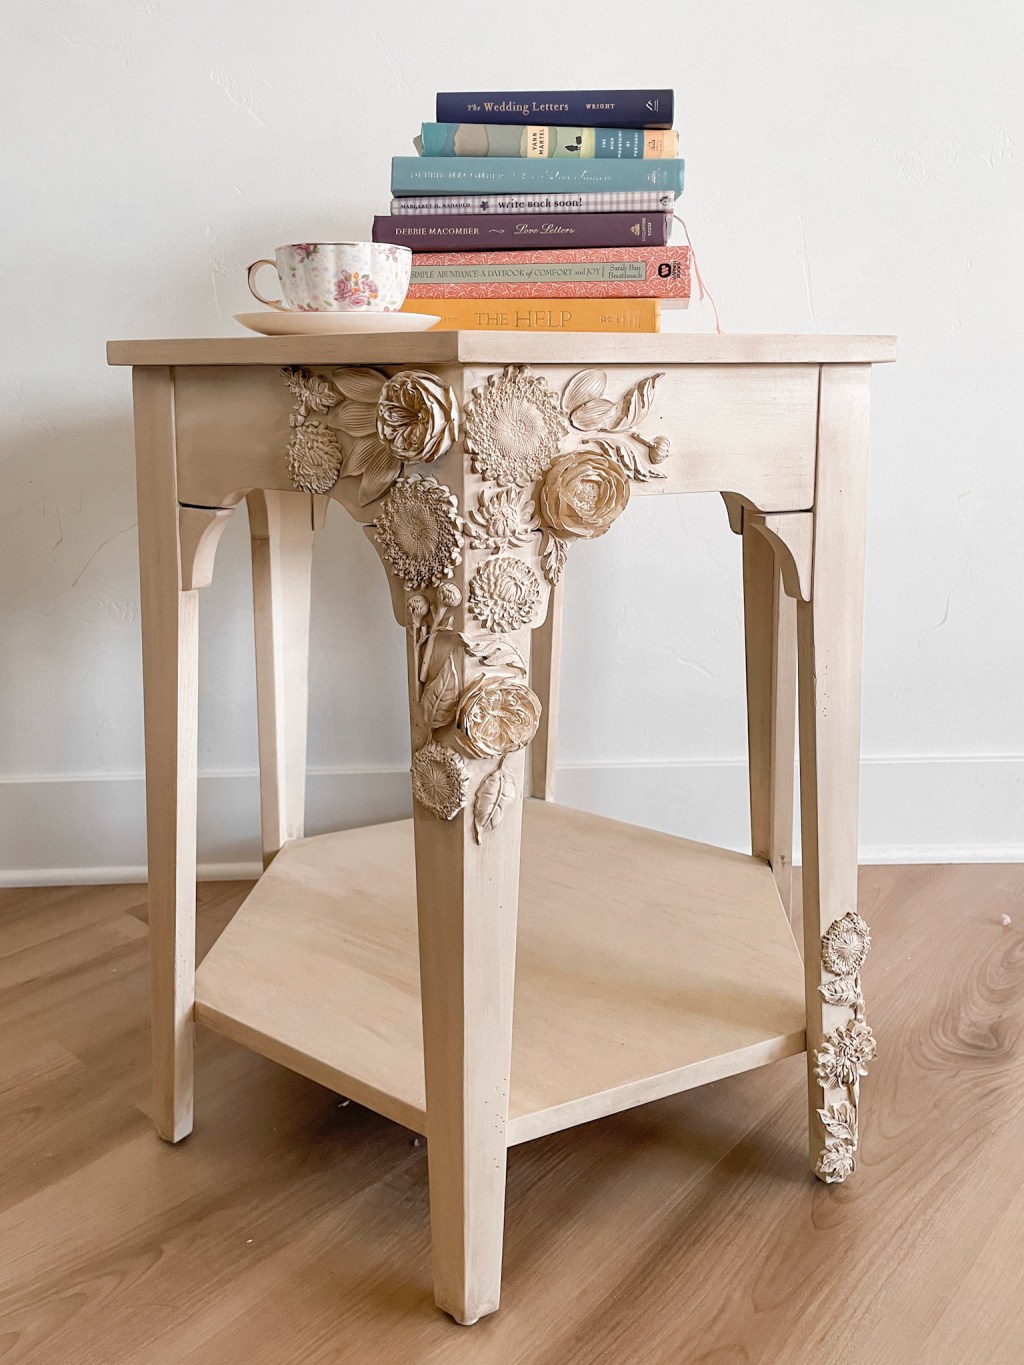

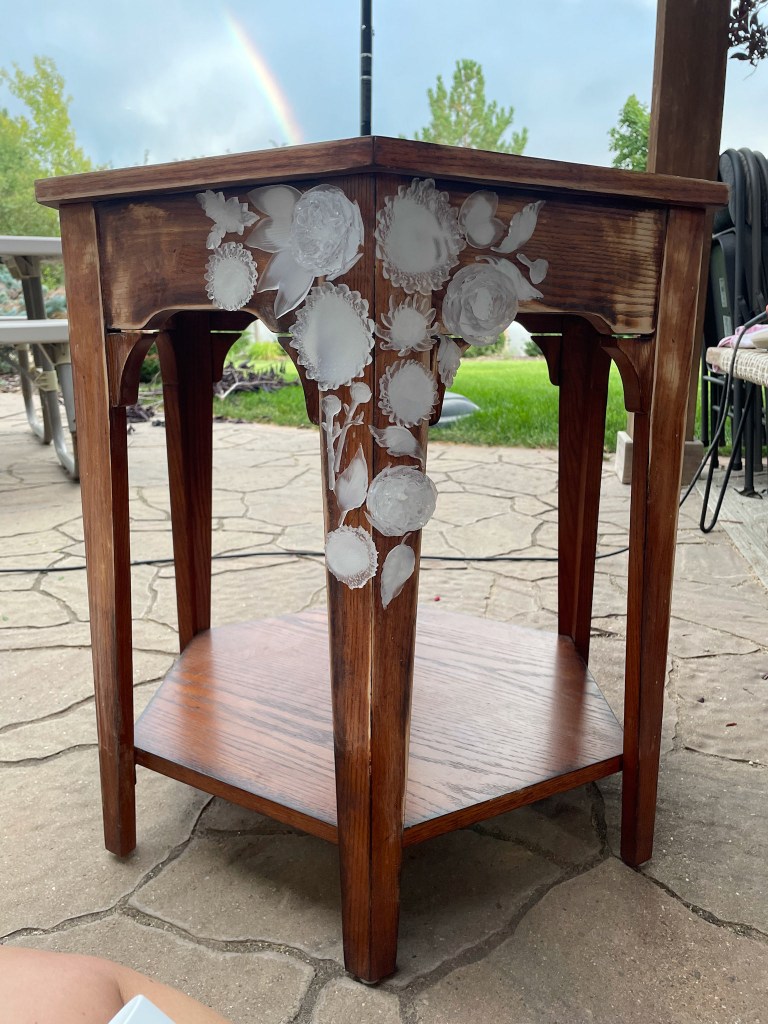
Hey there! So glad you stopped by! Hopefully this post can save you hundreds of dollars in the near future. How? By duping/hacking/DIY-ing some favorite Anthropologie furniture! I have been ogling the ornately carved furniture Anthropologie offers for quite some time but I just can’t justify the price. Maybe someday…but today is not that day and I wanted to see if I could create my own version. I have my sights set on larger pieces of furniture for the future but wanted to test this method on a little side table that has sat in the corner of a room just waiting to be made over!
Let’s start with the necessities! Here is everything you need:
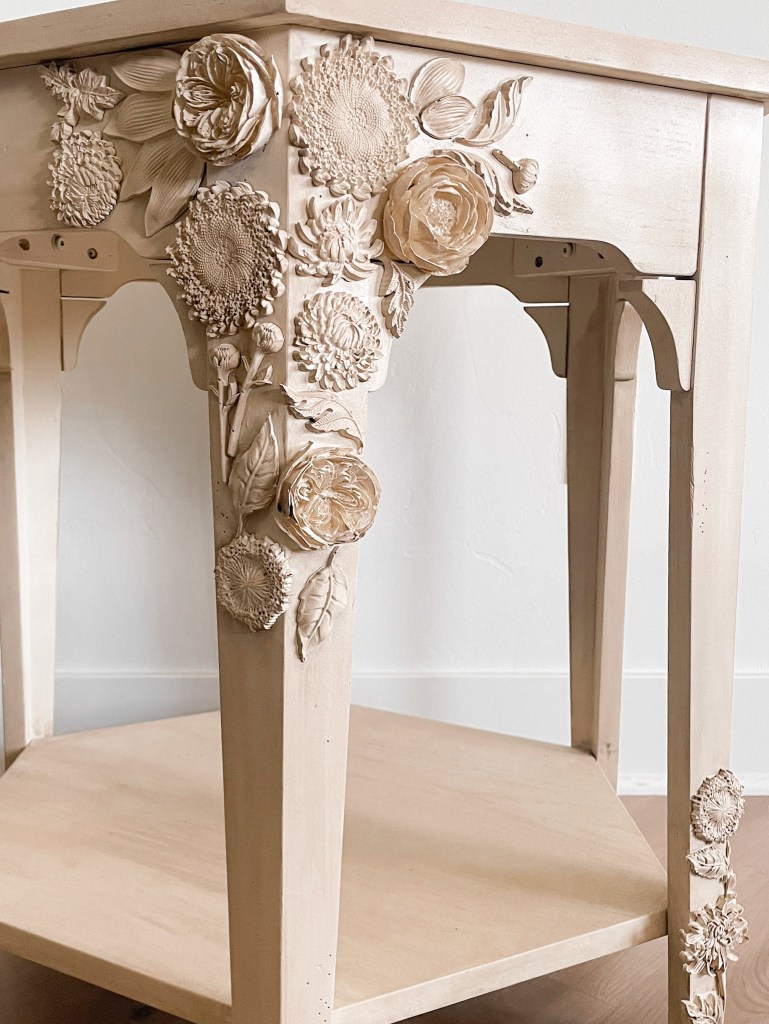
Mold #3– I used a variety of molds because I didn’t want the appliqués to look too much like a predictable pattern. I wanted it to be very whimsical and I LOVE how it turned out so, do yourself a favor and grab a few different trays! This last one was my favorite! I love the dimension they added to the piece!
>>Furniture piece of choice<<
For the bleached wood look:
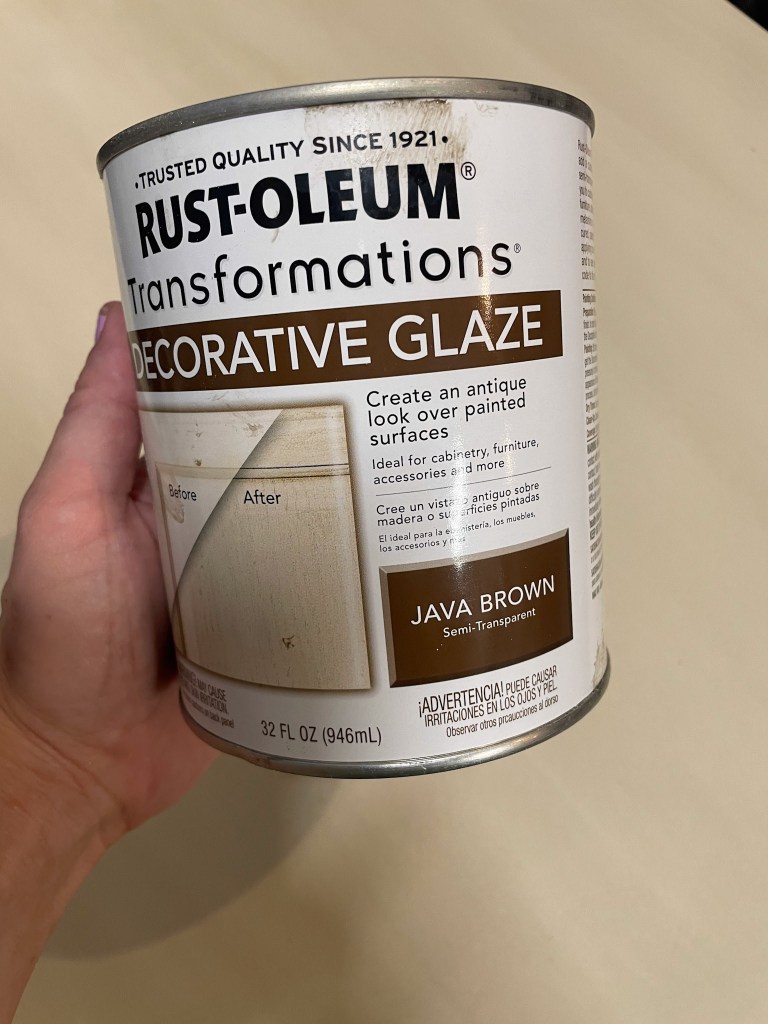
Rust-Oleum decorative glaze in Java Brown
Foam brush & an old shirt or towel
>>Don’t forget your mask and gloves! Remember, we’re working with epoxy, which is a toxic substance so make sure your work area is well ventilated and you are properly protected!<<

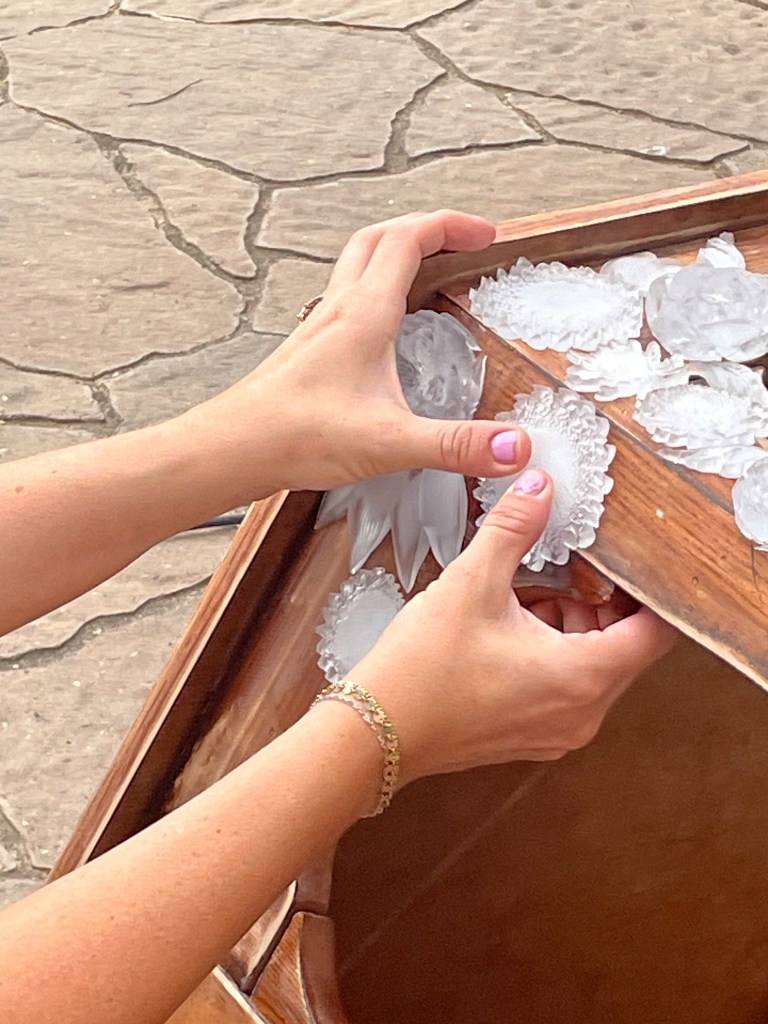
Alright, are we ready to rock ‘n roll?! First, don your PPE (throwing it back to my days in the medical field- Personal Protective Equipment) and follow the instructions on your resin epoxy mix. Mix VERY thoroughly! Definitely don’t half-crap this part! Mix the Resin and Hardener at a 1:1 ratio. Gently pour into the molds. Don’t over pour! We don’t want a crazy mess, now do we? Allow to set up between 8-10 hours in a well ventilated area (remember my recommendation to get several molds? Yeah, this is why.).
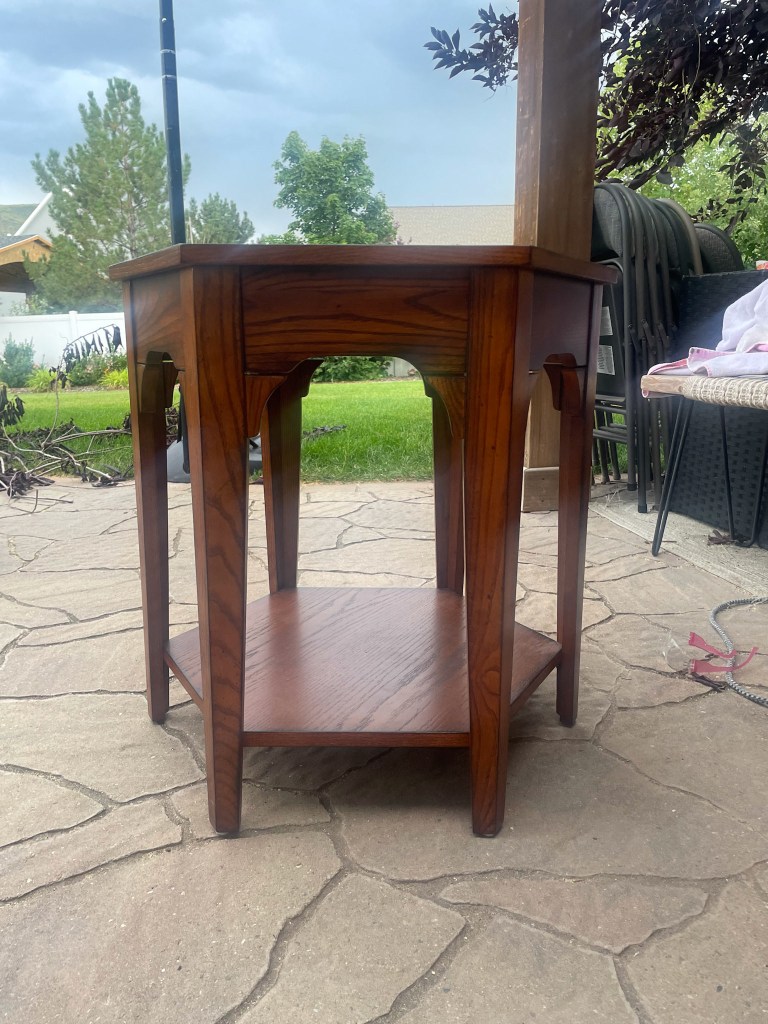
Second, while your epoxy appliqués are curing, grab your furniture piece that is about to get the flip of its lifetime and sand sand sand! We need a good surface for the paint and adhesive to adhere to BUT, that being said, you don’t need to sand it down completely raw. Just roughing the surface a bit and getting rid of any finish currently on the piece should do.
Okay, now the tricky part of everything. Let me just tell you my experience and you can learn from my failures, mistakes, and victories! I wasn’t entirely sure what color I wanted to do for the table so I thought I would just go ahead, adhere the flowers and figure it out all later. Well…..That would have been a good plan had I not decided to do the wood bleach look. So if you’re not planning on doing any type of faux wood look, go right ahead and skip this next part!
Okay, so I adhered the flowers using the Loctite adhesive. The trick here is to create a nice flow. I find that the more clustered and variety you give the flowers, the more “Anthro”ish it looks. We’re shooting for whimsy here- not perfect symmetry! In fact, avoid symmetry! Once the flowers were adhered, I whipped out my paint sprayer and went to town! I had to get some crazy angles in there to cover all the flowers and I’ll be honest, it was a little tricky.

If you are going for the bleached wood look, READ ON! If you have painted your masterpiece and it is everything you dreamed of, go ahead and stop reading, but send us a pic of the finished product or tag us on instagram (@homewithq). We’d love to see it!
Now, for all you bleachers…Well, we’re not really bleaching wood but we are pretending that we are. With a foam brush, brush on a good amount of glaze. Try this out first on an inconspicuous place on the furniture so you can get a feel for how you want it to look! Brush on, wipe off. That’s all there is to it! I did one layer all around the table but decided that same areas still looked a little too “painted”. I gave those areas a nice second coat of the glaze.
Now let’s address those flowers. This is the part where I have totally re-evaluated my life. JK, I just re-evaluated this method. I used the same technique on the flowers and found it really difficult to get a nice uniform look with the glaze that didn’t look like a preschooler went to town with a brown marker (no offense, pre-schoolers…wait, they’re not reading this anyway). This part took a lot of elbow grease and buffing in the glaze to avoid splotches and get a subtle wood look. After I completed the first round of this project I decided to add WAY more flowers to really finish off the table from all sides and I thought it would be much easier to paint the flowers before they were adhered onto the table so I could have an easier time getting the look I wanted with the glaze. Welllllll…..check out my fail below.
Yep, the flowers totally blew away with my big heavy duty paint sprayer. DUH! Why did I not realize this before {insert biggest head slap ever}? So, instead, I pick up each individual flower, sacrificed my hand, and painted the flowers whilst holding them. Definitely not the easier option that I previously would have thought… but they still turned out pretty? I can take comfort in that.
This is what I am going to do next time I attempt this project- specifically with the bleached-wood style.
1. Prep the furniture piece as described above. Apply ONE coat of paint
2. Adhere appliques
3. Paint appliques after being adhered to the furniture and finish off the piece with a second coat of paint.
This will solve the problem of having patches of unpainted furniture possibly seen under the appliqués AND you can avoid painted fingers/paint chaos! As far as the glaze goes, honestly, it turned out better the first go-around when the flowers were already adhered so I would stick to that method again. The only thing I will add next time is the small itty bitty paint brush I used during attempt 2 to individually apply glaze to the smaller flowers and small spaces between flowers. That seemed to work out the best!


Well, there ya have it, folks! Above is the piece that inspired me to attempt this little project and I’m so glad I did! I can’t wait to tackle a vintage dresser next! Don’t worry, I’ll report my progress as I go about that project but for the time being, I’m very pleased with how my little table turned out!
Want more DIY’s and design ideas? find us on Instagram @homewithq and follow along for more fun!

Leave a comment